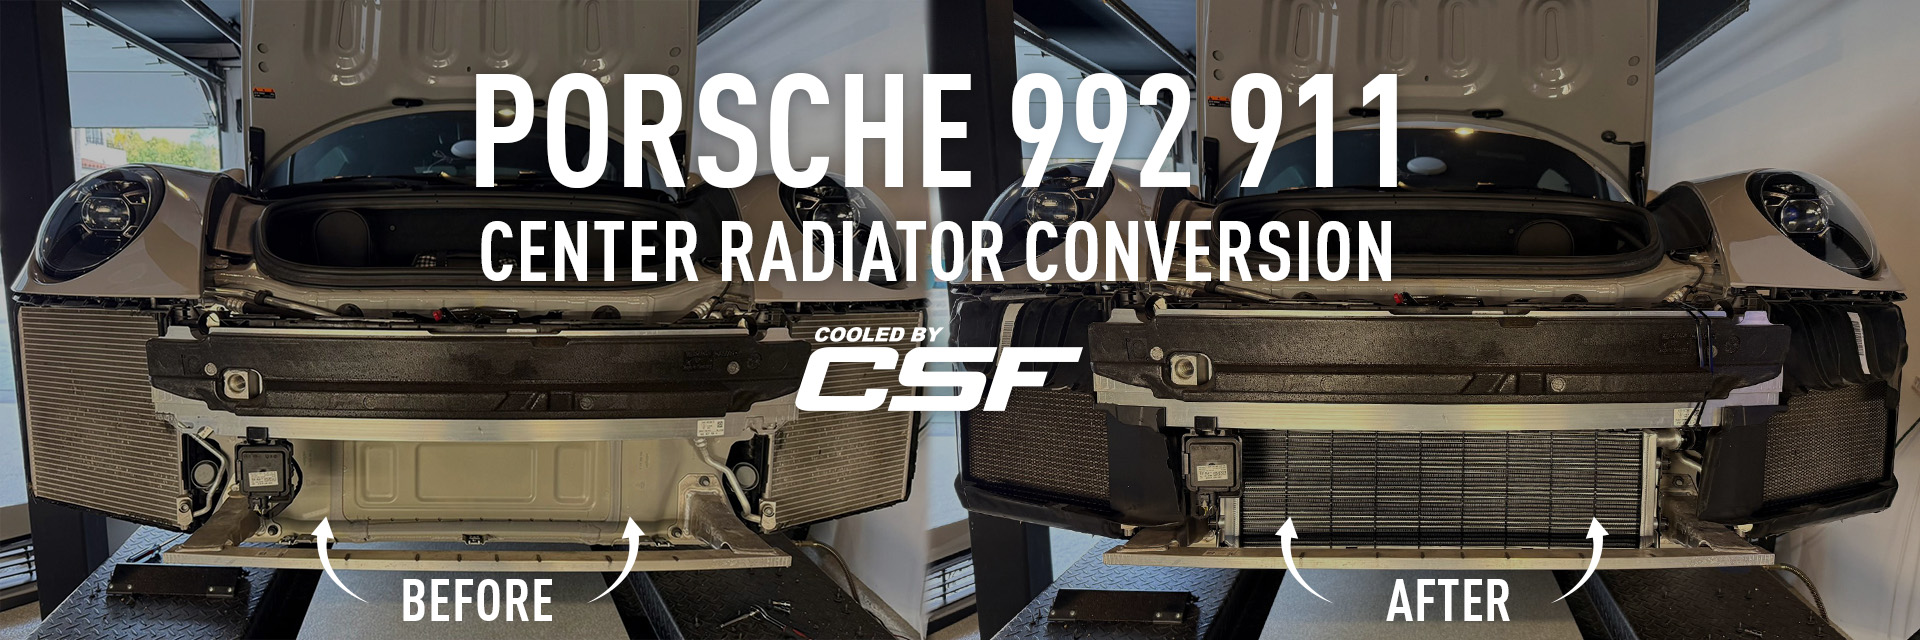
Many if not most of the Porsche 992 3.0 Turbo Models did not come with center radiators. This did vary on package, trim, and region. Please verify with your dealer or visually check if your 992 came equipped with one before ordering the CSF #7243 Center Radiator or considering a conversion. The information below will help you perform a 992 911 Center Radiator Conversion / Retrofit.
992 Center Radiator REtrofit
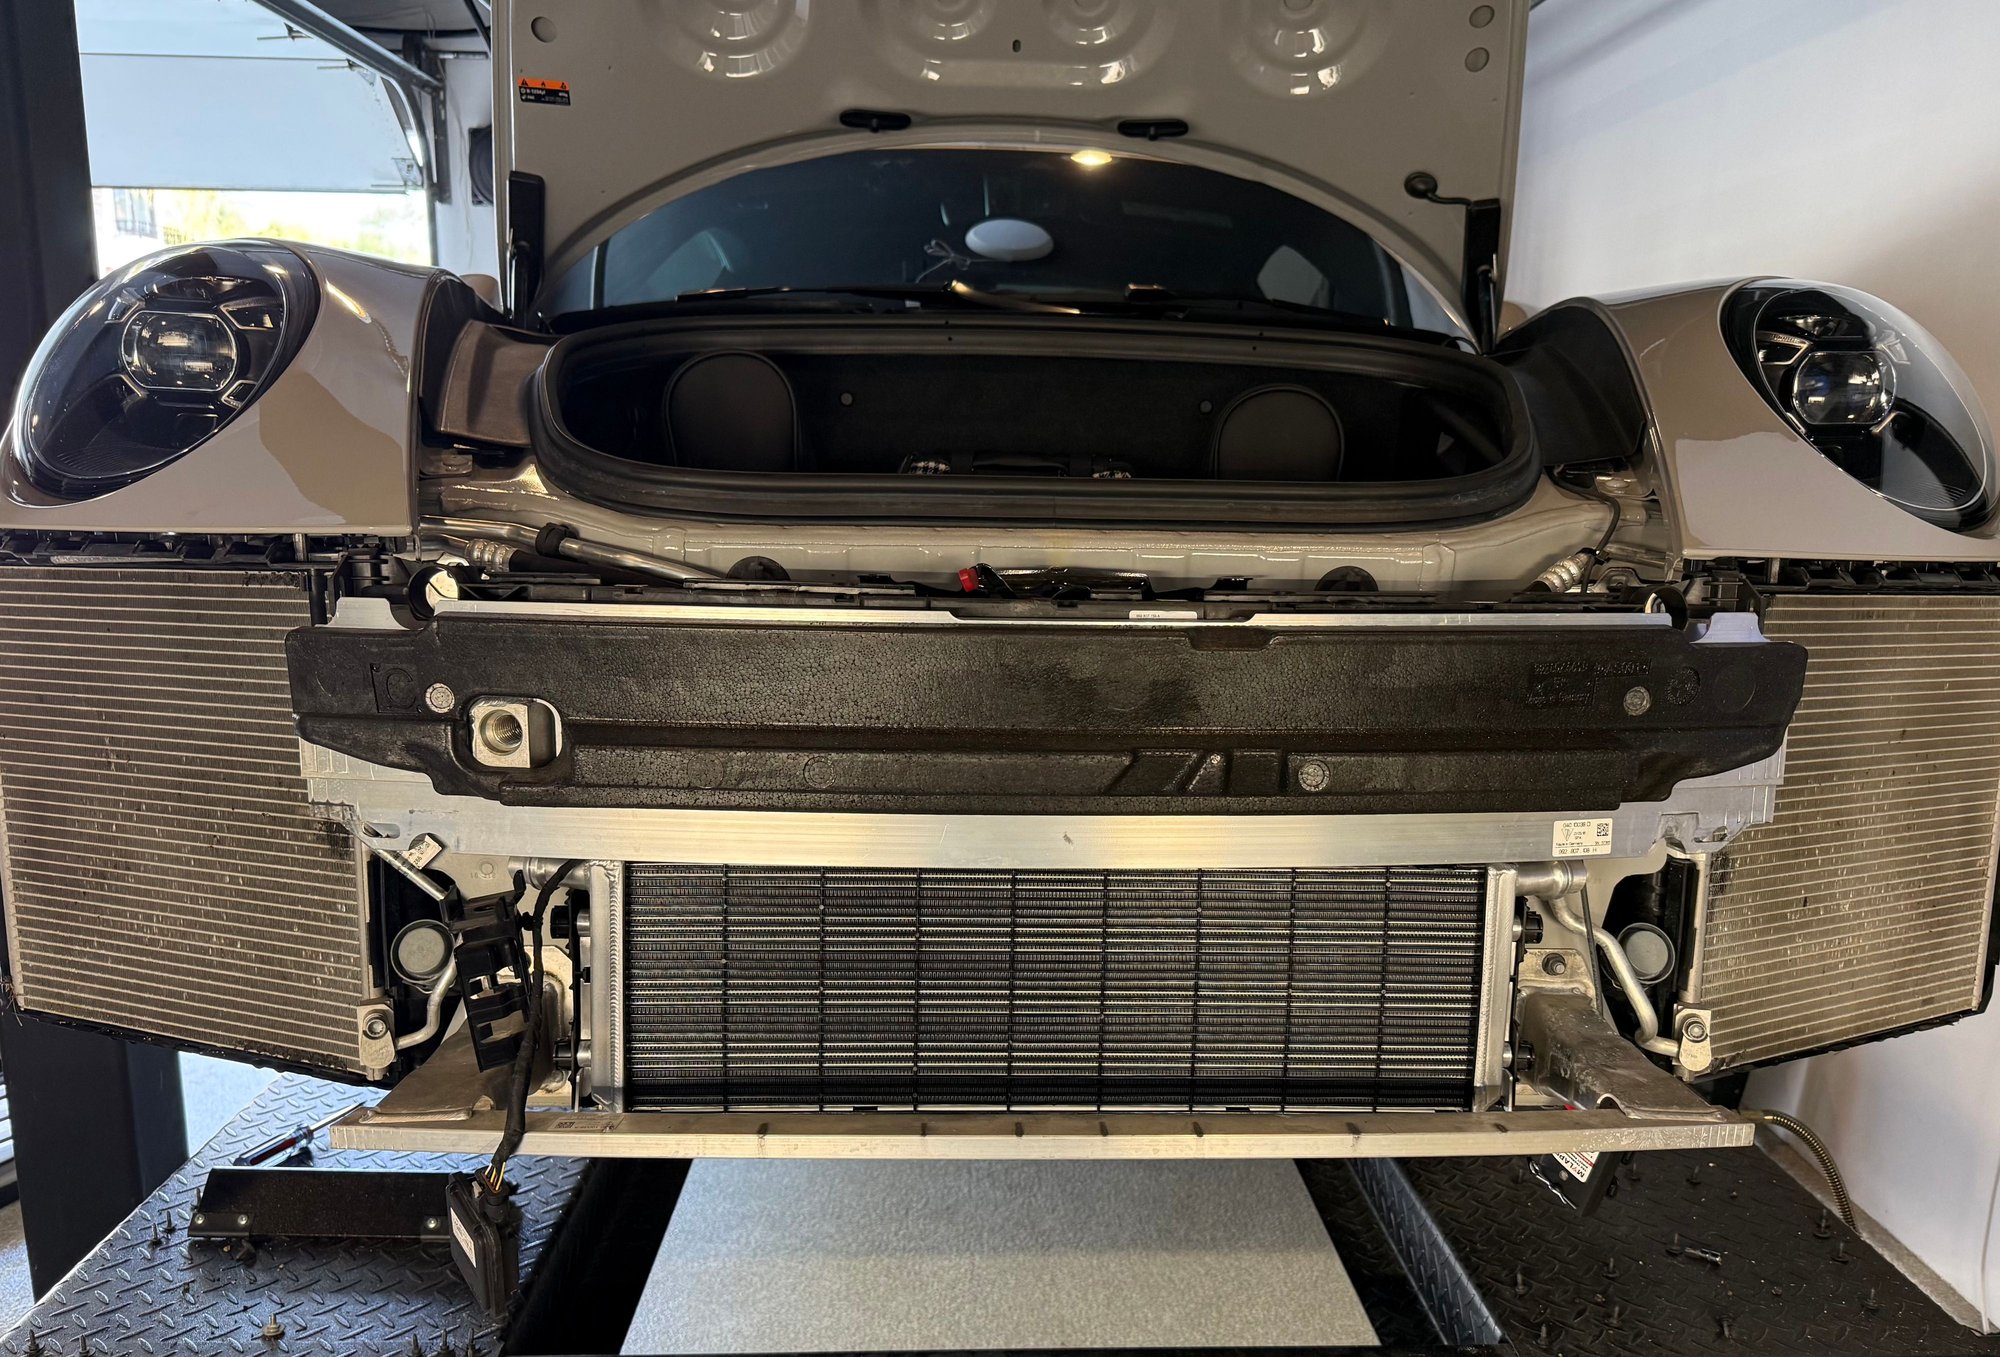
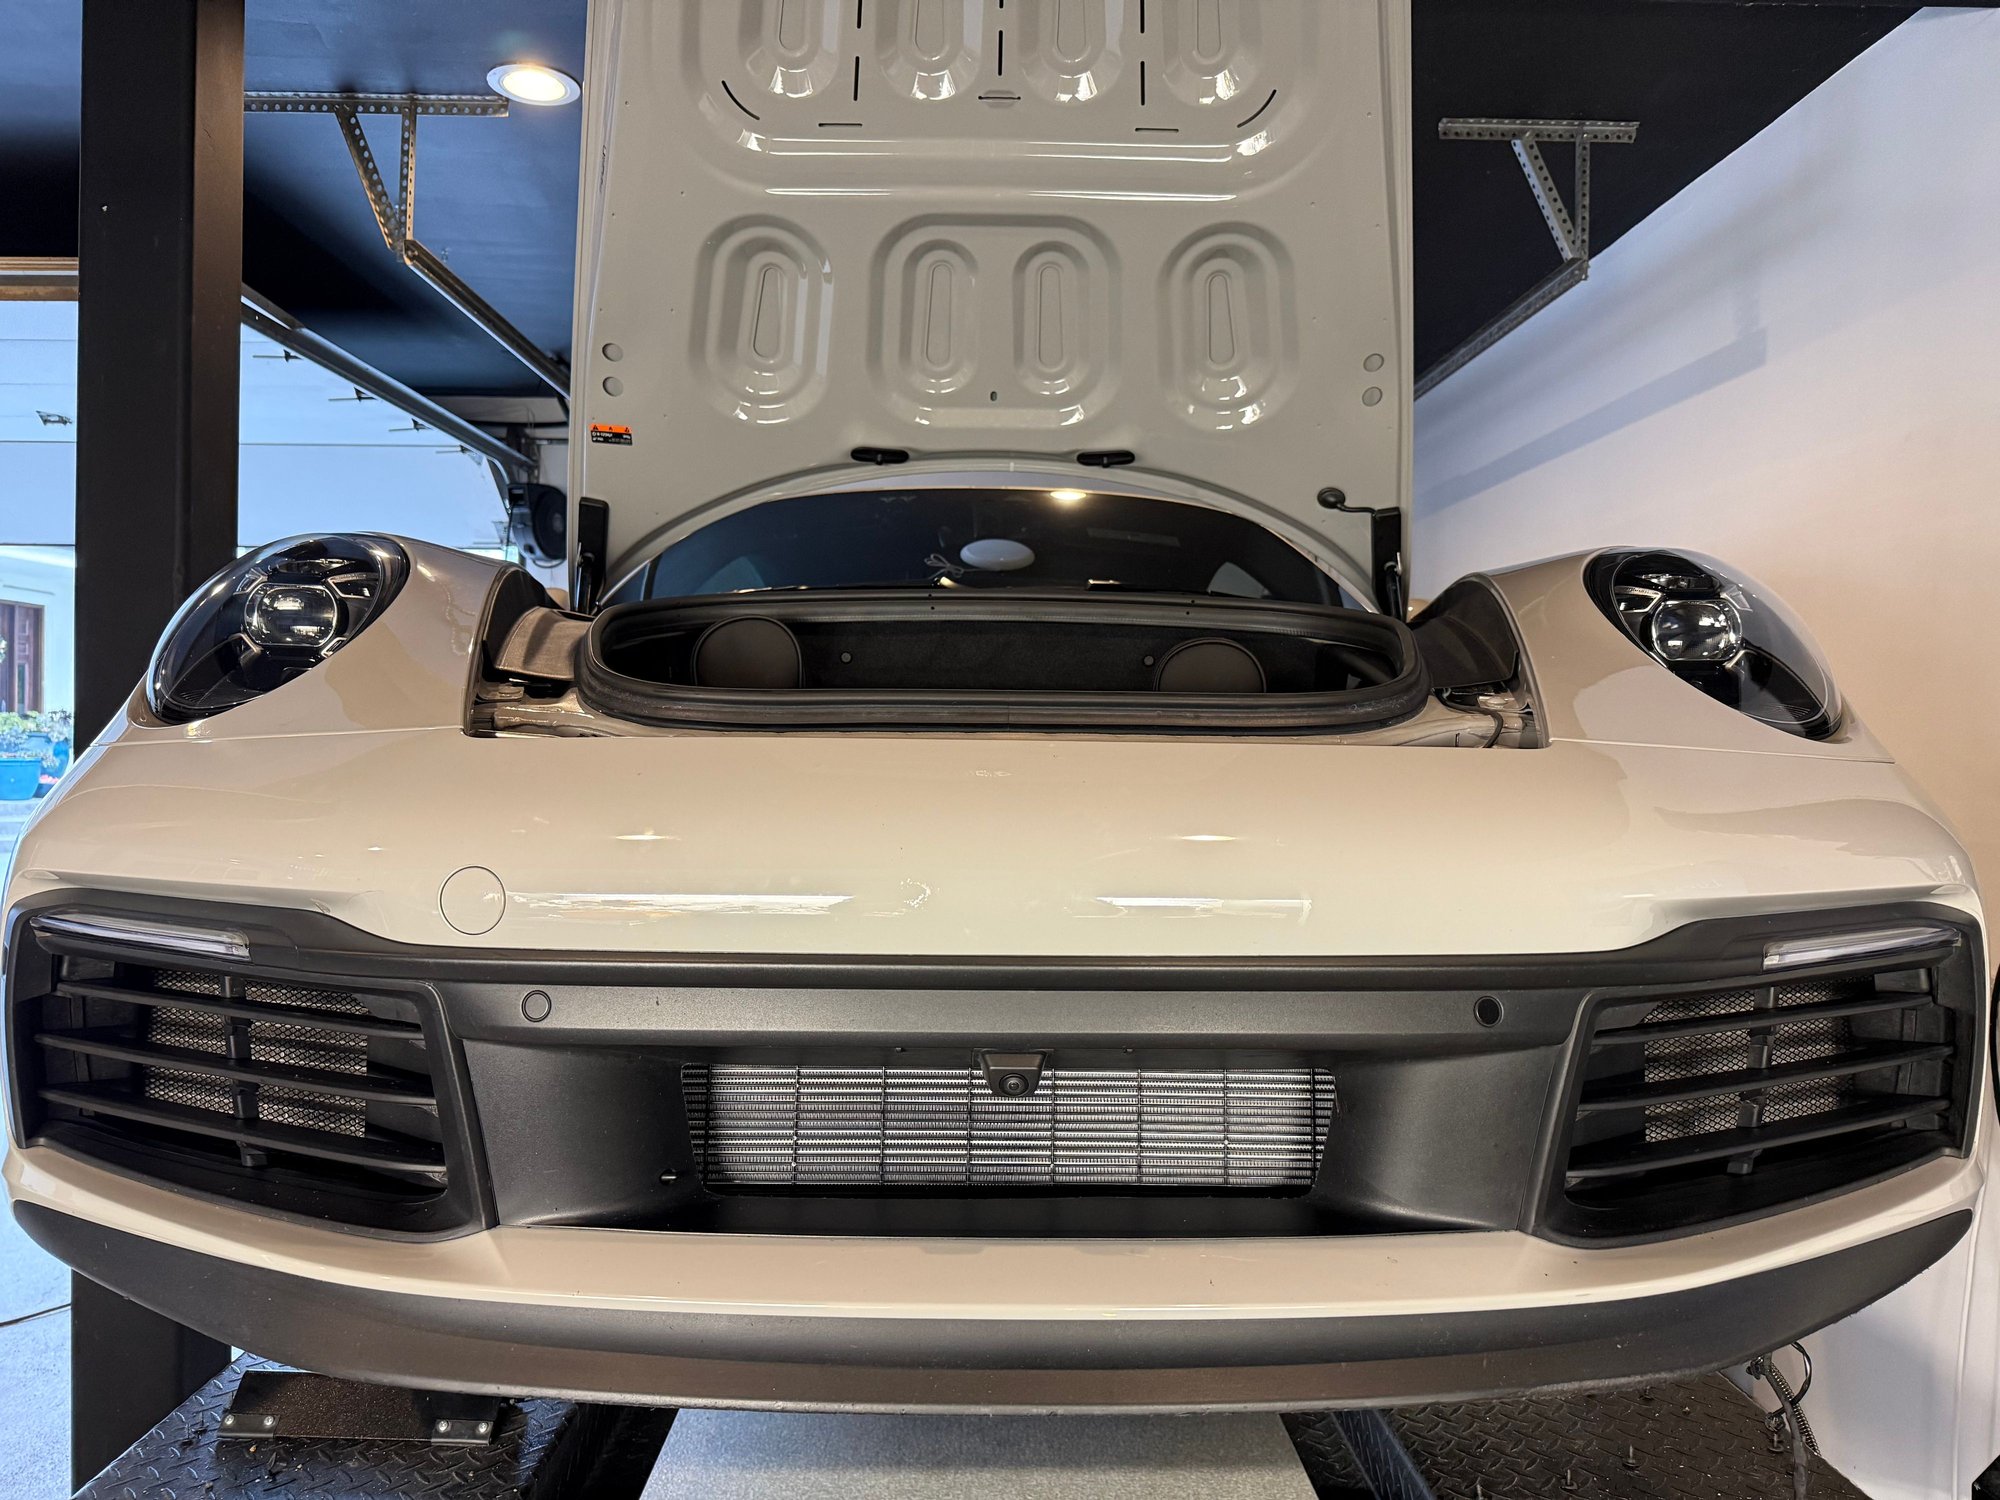
If your 992 911 did not come equipped with a center radiator, it is fairly simple and straight forward to add one on. This can be done using all OEM Porsche Parts to fit the CSF #7243 Center Radiator. Rennlist member REVS11 put together a nice DIY post on the Rennlist Forum. We have combined that with our part number knowledge to put together the most comprehensive guide possible. This will continue to be updated as we get more feedback on the conversion.
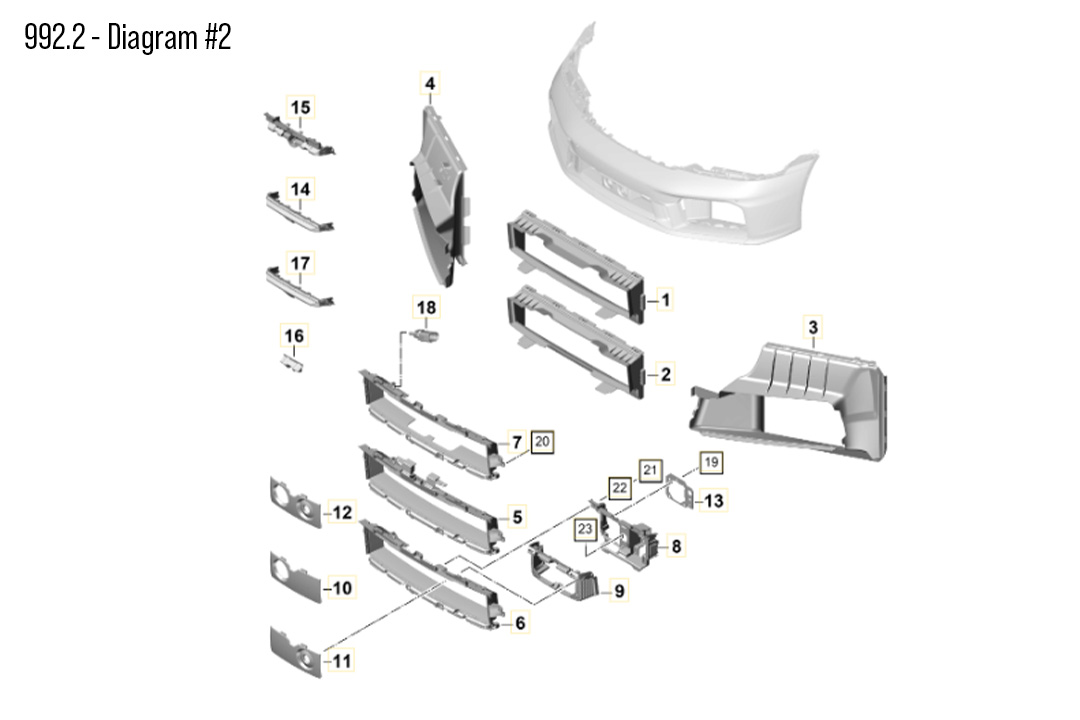
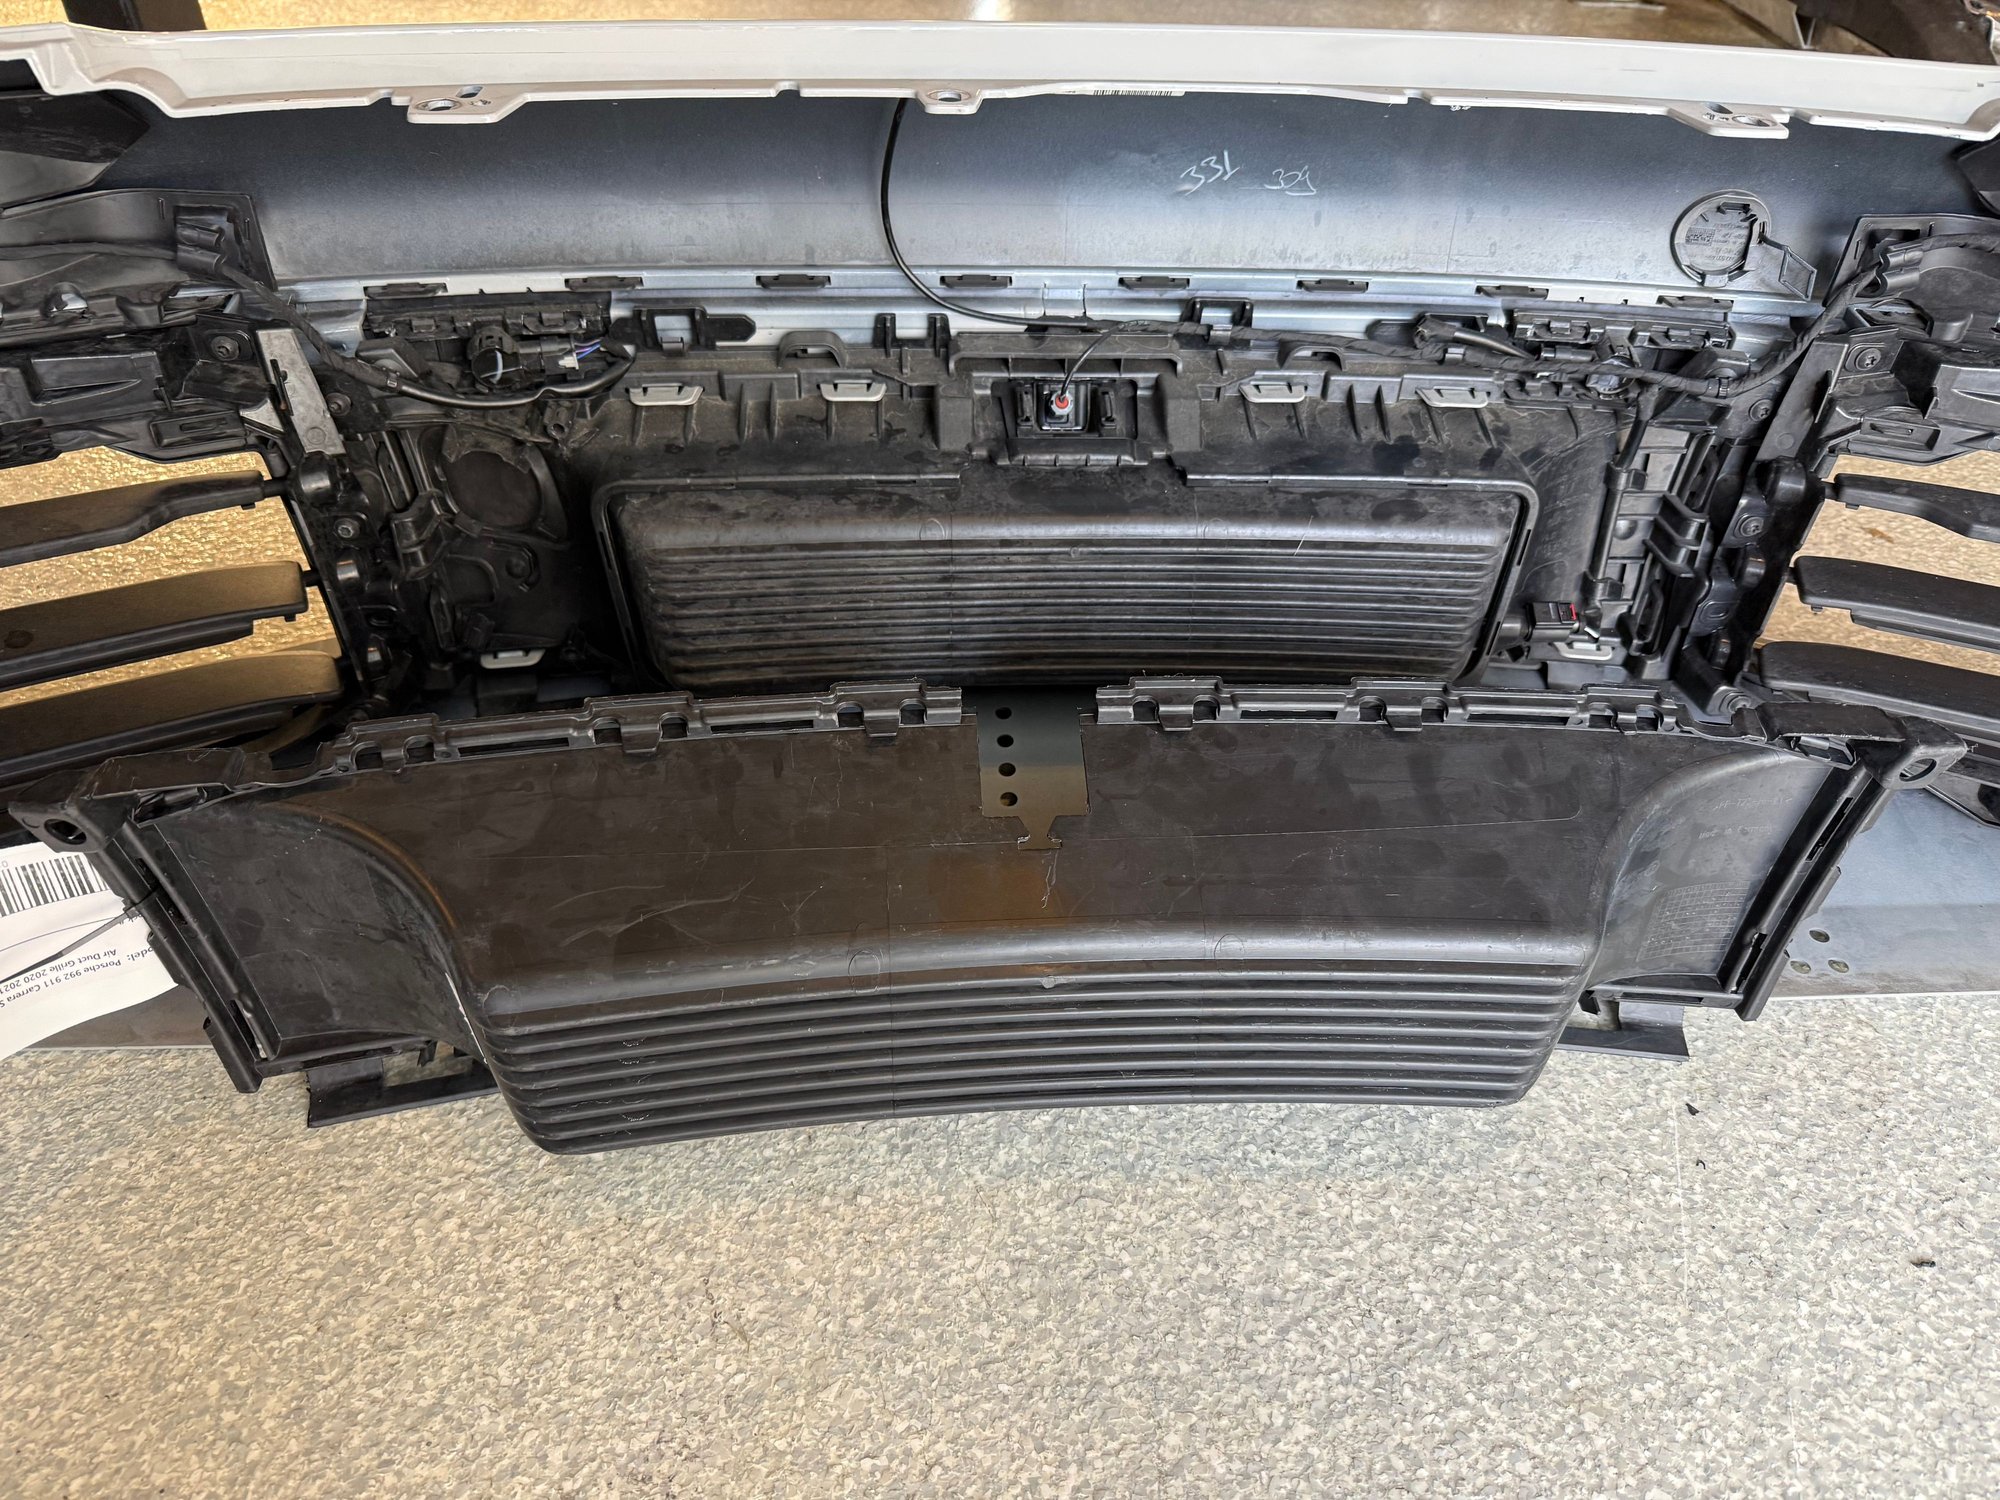
The part that will vary from vehicle to vehicle is the center grill. For 992’s not equipped with a center radiator, the center grill will be solid and blocked off. You can either cut your existing grill open or replace it with the proper “open center grill”. There are several options depending on if your 911 is a 992.1 or 992.2, if you have Adaptive Cruise Control (ACC), Trim Level, Aero Package, Etc. We recommend you verify with a dealer which open center grill fits your vehicle’s bumper.
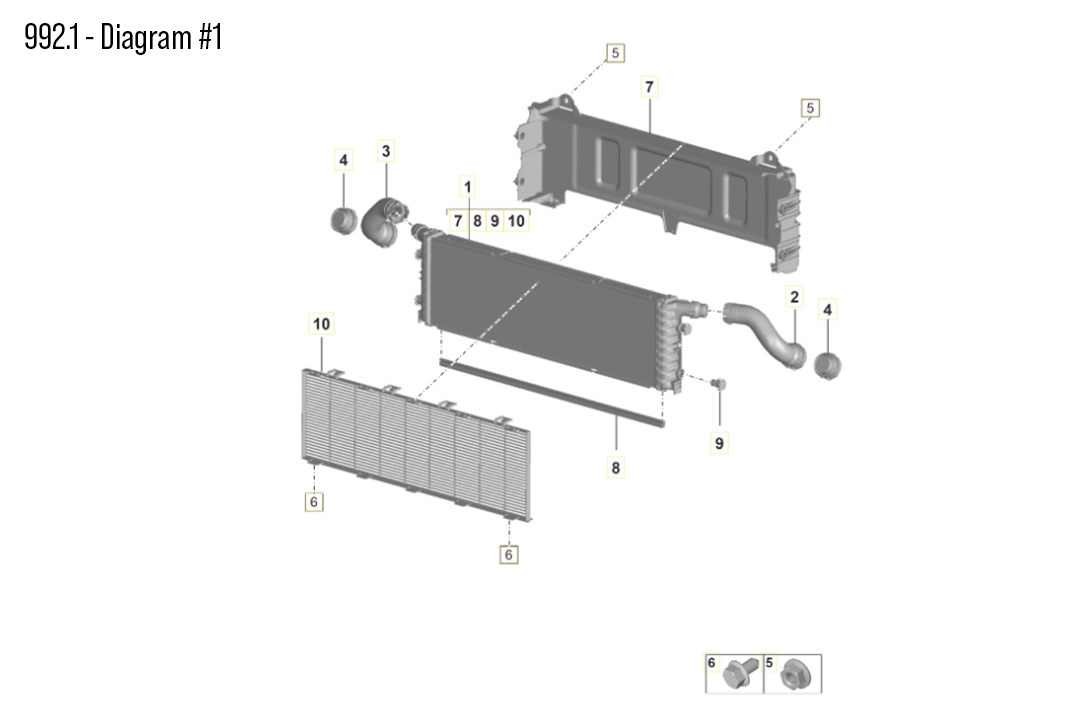
992.1 Conversion Parts List:
Table 1
| Ref. # (992.1 Diagram #1) | 992.1 Part Number | Description | Quantity |
|---|---|---|---|
| 1 | CSF #8243 | CSF 992 Center Radiator | 1 |
| 2 | 992 121 629 A | Coolant hose (left) | 1 |
| 3 | 992 121 630 A | Coolant hose (right) | 1 |
| 4 | 992 121 418 | Sealing caps | 2 |
| 5 | PAF 902 158 | Hexagon collar nut (M6) | 2 |
| 6 | N 107 591 01 | Hex collared bolt (M6X12) | 1 |
| 7 | 992 121 694 | Air guide | 1 |
| 8 | 9P1 121 687 B | Seal | 1 |
| 9 | 992 121 577 | Mounting pins | 4 |
| 10 | 992 121 557 A | Stone Guard (optional) | 1 |
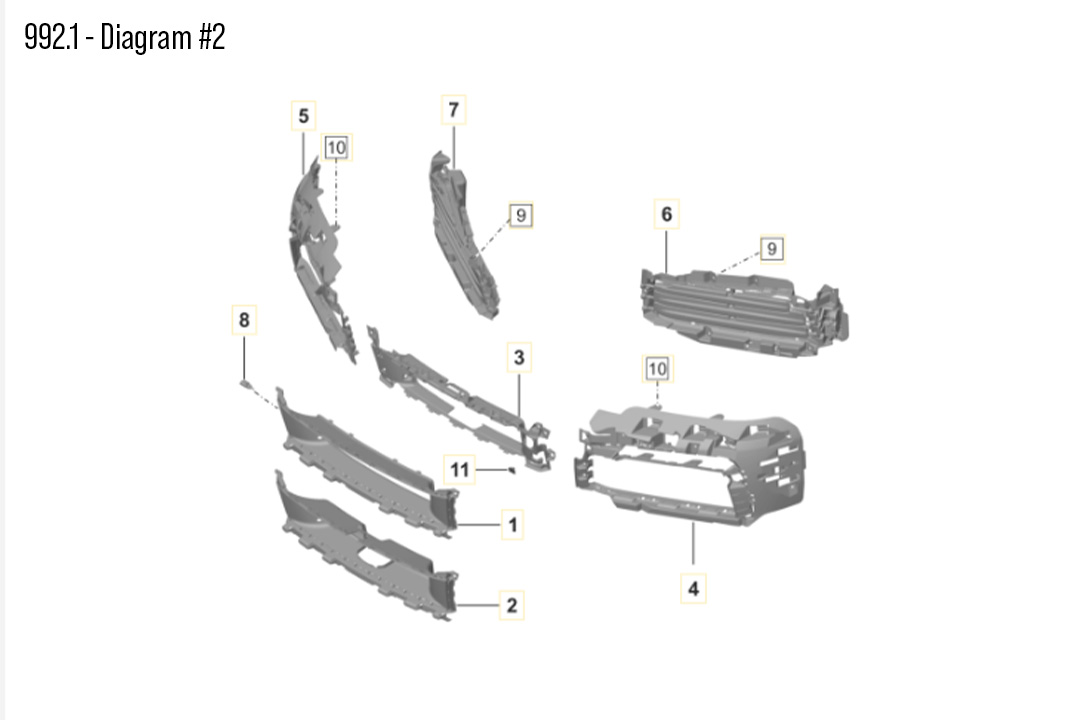
Bumper Grill Options (please verify with your dealer that are selecting the correct option for your 992.1):
Table 2
| Ref. # (992.1 Diagram #2) | 992.1 PN | Description | Quantity | Notes |
|---|---|---|---|---|
| 1 | 992 807 681 BG | Center Grille (open) | 1 | Call your dealer to verify fitment |
| 1 | 992 807 681 BQ | Center Grille (open) | 1 | Call your dealer to verify fitment |
| 1 | 992 807 681 BL | Center Grille (open) | 1 | Call your dealer to verify fitment |
| 1 | 992 807 681 CA | Center Grille (open) | 1 | Call your dealer to verify fitment |
| 1 | 992 807 681 BH | Center Grille (open w/ ACC) | 1 | Call your dealer to verify fitment |
| 1 | 992 807 681 BR | Center Grille (open w/ ACC) | 1 | Call your dealer to verify fitment |
| 1 | 992 807 681 BM | Center Grille (open w/ ACC) | 1 | Call your dealer to verify fitment |
| 1 | 992 807 681 BF | Center Grille (open w/ ACC) | 1 | Call your dealer to verify fitment |
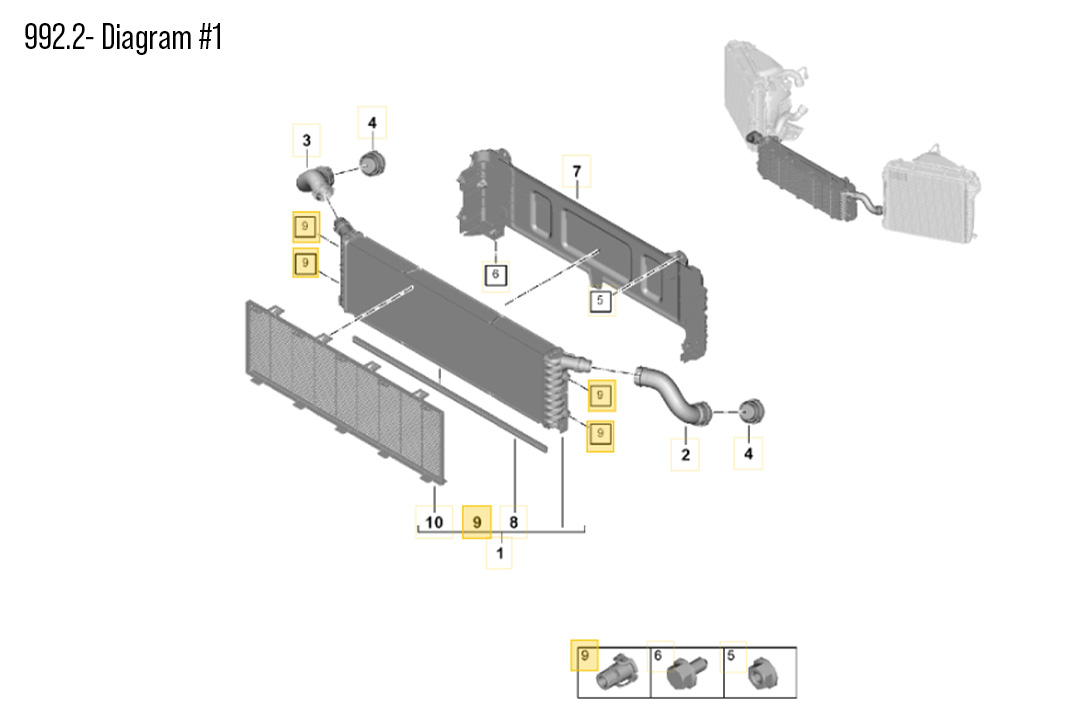
992.2 Conversion Parts List:
Table 1
| Ref. # (992.2 Diagram #1) | 992.2 Part Number | Description | Quantity |
|---|---|---|---|
| 1 | CSF #8243 | CSF 992 Center Radiator | 1 |
| 2 | 992 121 629 A | Coolant hose (left) | 1 |
| 3 | 992 121 630 A | Coolant hose (right) | 1 |
| 4 | 992 121 418 | Sealing caps | 2 |
| 5 | PAF 008 573 | Hexagon collar nut (M6) | 2 |
| 6 | N 107 591 01 | Hex collared bolt (M6X12) | 1 |
| 7 | 992 121 694 A | Air guide | 1 |
| 8 | 9P1 121 687 B | Seal | 1 |
| 9 | 992 121 577 | Mounting pins | 4 |
Bumper Grill Options (please verify with your dealer that are selecting the correct option for your 992.2):
Table 2
| Ref. # (992.2 Diagram #2) | 992.2 Part Number | Description | Quantity | Notes |
|---|---|---|---|---|
| 1 | 992 815 217 G | Air guide | 1 | Standard Bumper w/o Night Vision |
| 1 | 992 815 217 K | Air guide | 1 | Standard Bumper w/ Night Vision |
| 2 | 992 815 217 H | Air guide | 1 | Sport Design w/o ACC & NV |
| 2 | 992 815 217 J | Air guide | 1 | Sport Design w/ either ACC or NV |
| 5 | 992 807 681 CE | Center Grille (open) | 1 | Standard Bumper (no 360 camera) |
| 5 | 992 807 681 CG | Center Grille (open) | 1 | Sport Design w/o 360 Camera, ACC, NV |
| 6 | 992 807 681 CN | Center Grille (open) | 1 | Standard Bumper (w/ camera) |
| 6 | 992 807 681 CH | Center Grille (open) | 1 | Sport Design w/ 360 Camera & w/o ACC & NV (not hot country) |
| 7 | 992 807 681 CQ | Center Grille (open) | 1 | Standard Bumper (w/ ACC) |
| 6 | 992 807 681 CJ | Center Grille (open) | 1 | Sport Design w/ 360 Camera & w/o ACC & NV |
| 7 | 992 807 681 CK | Center Grille (open) | 1 | Sport Design w/ ACC & NV |
Installation Guide/Instructions (credit REVS11)
- Jack up front of car, higher is better
- Disconnect the negative terminal on the battery
- Remove the front wheels
- Remove the side markers
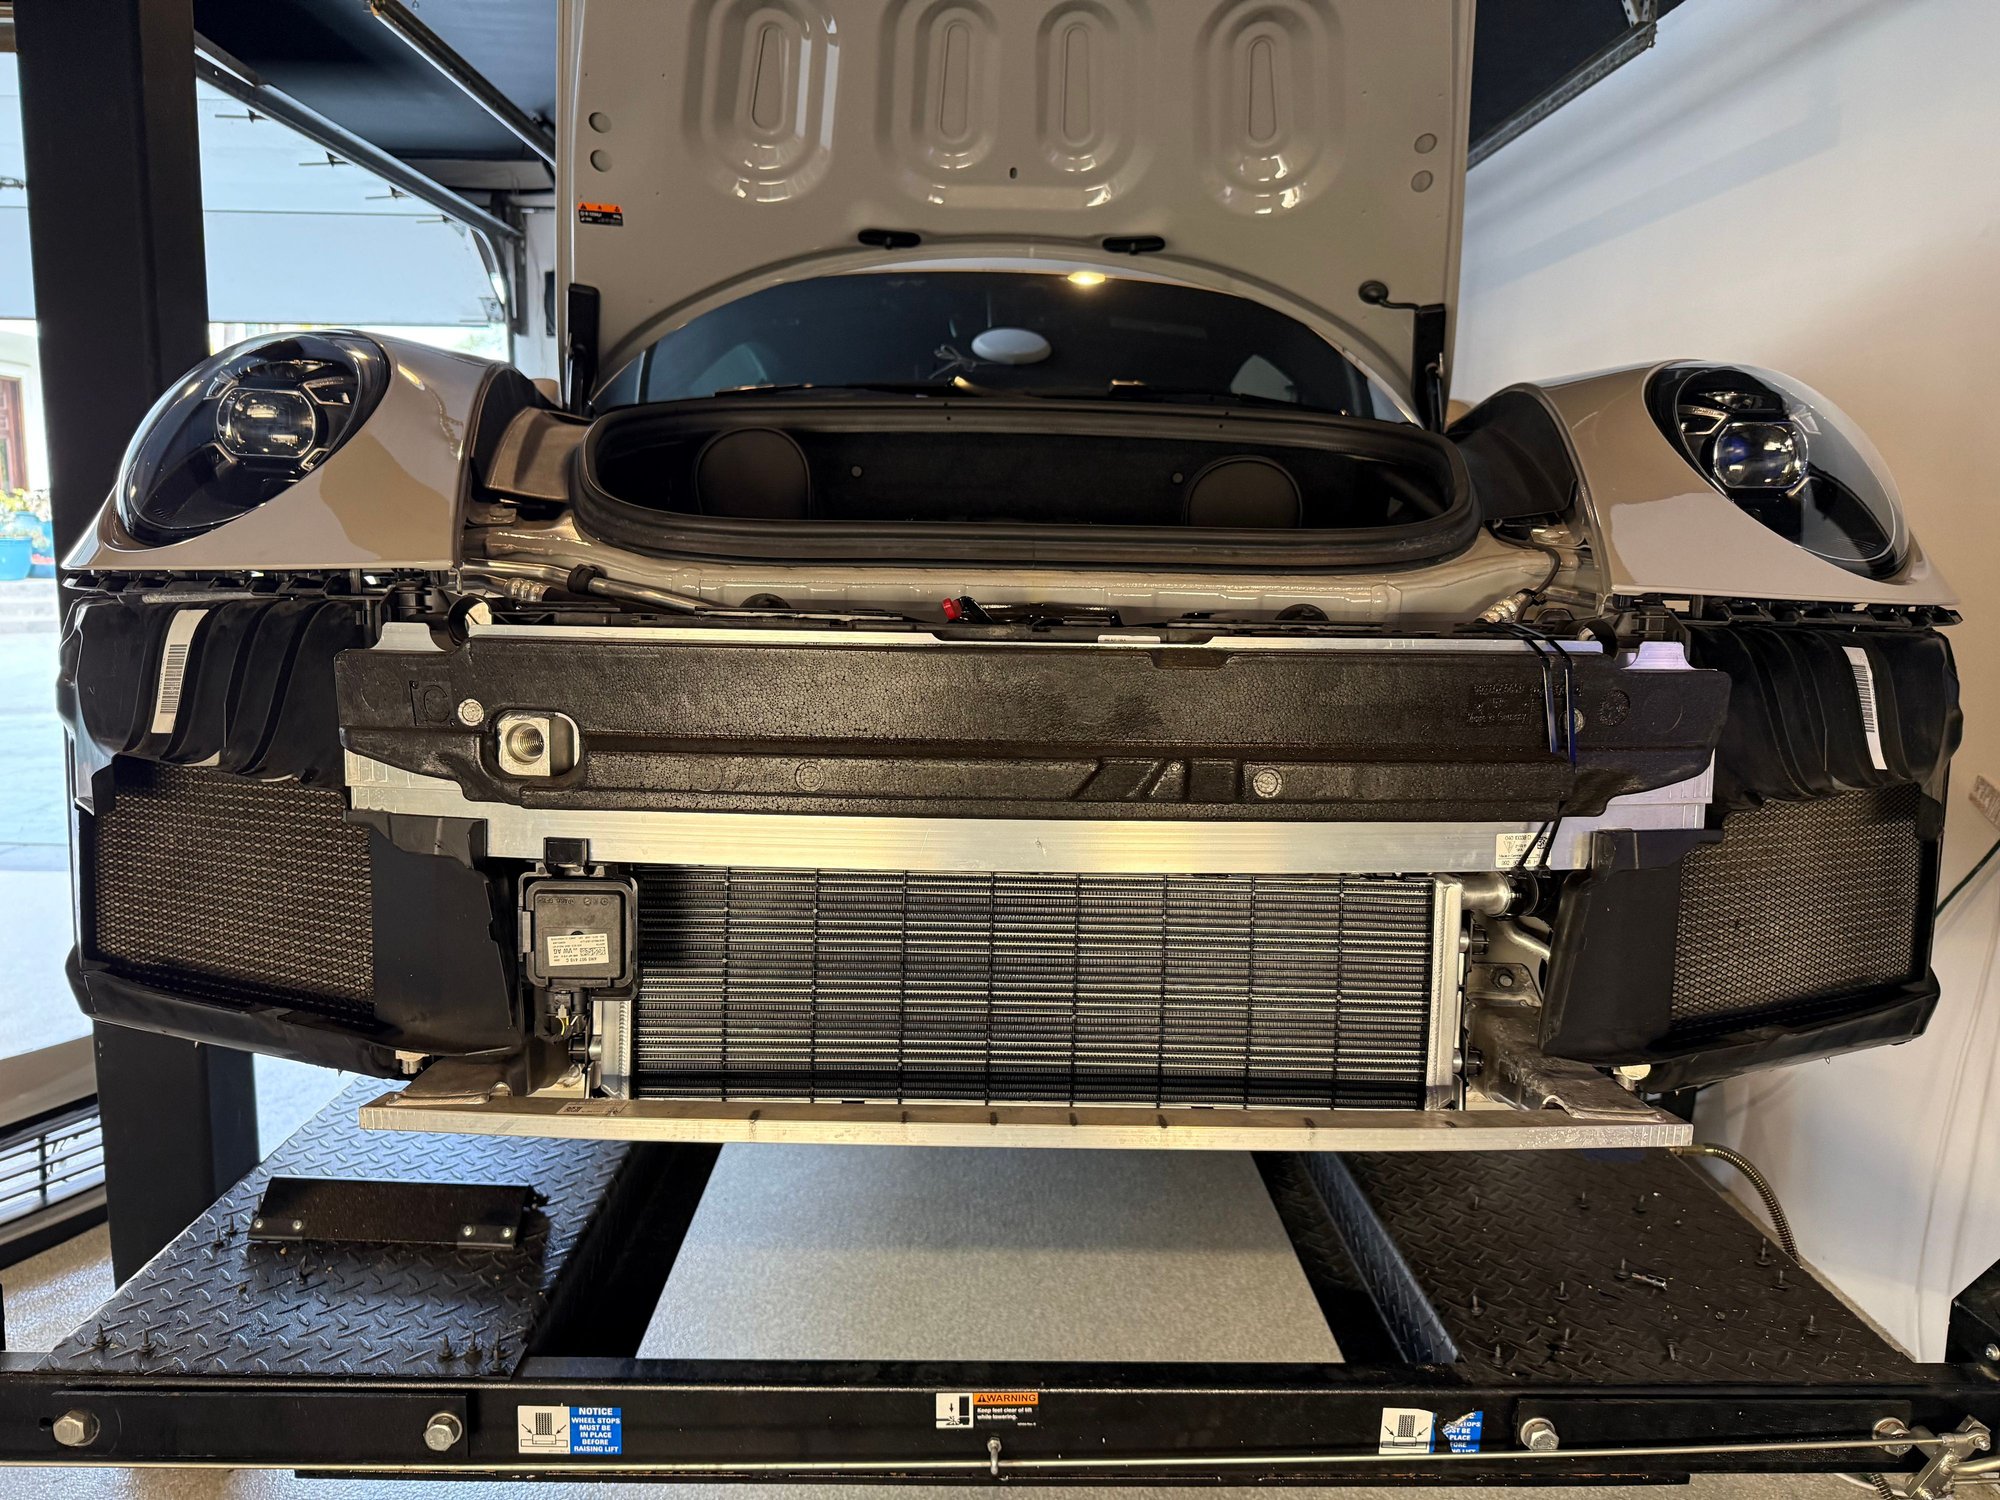
- Remove the front bumper including the fender liners. There are several T25 torx screws and connectors in both wheel wells (see KIES Motorsport Youtube video for 992 bumper removal, same process for Carrera and Turbo)
- Unclip and remove side radiator shrouds
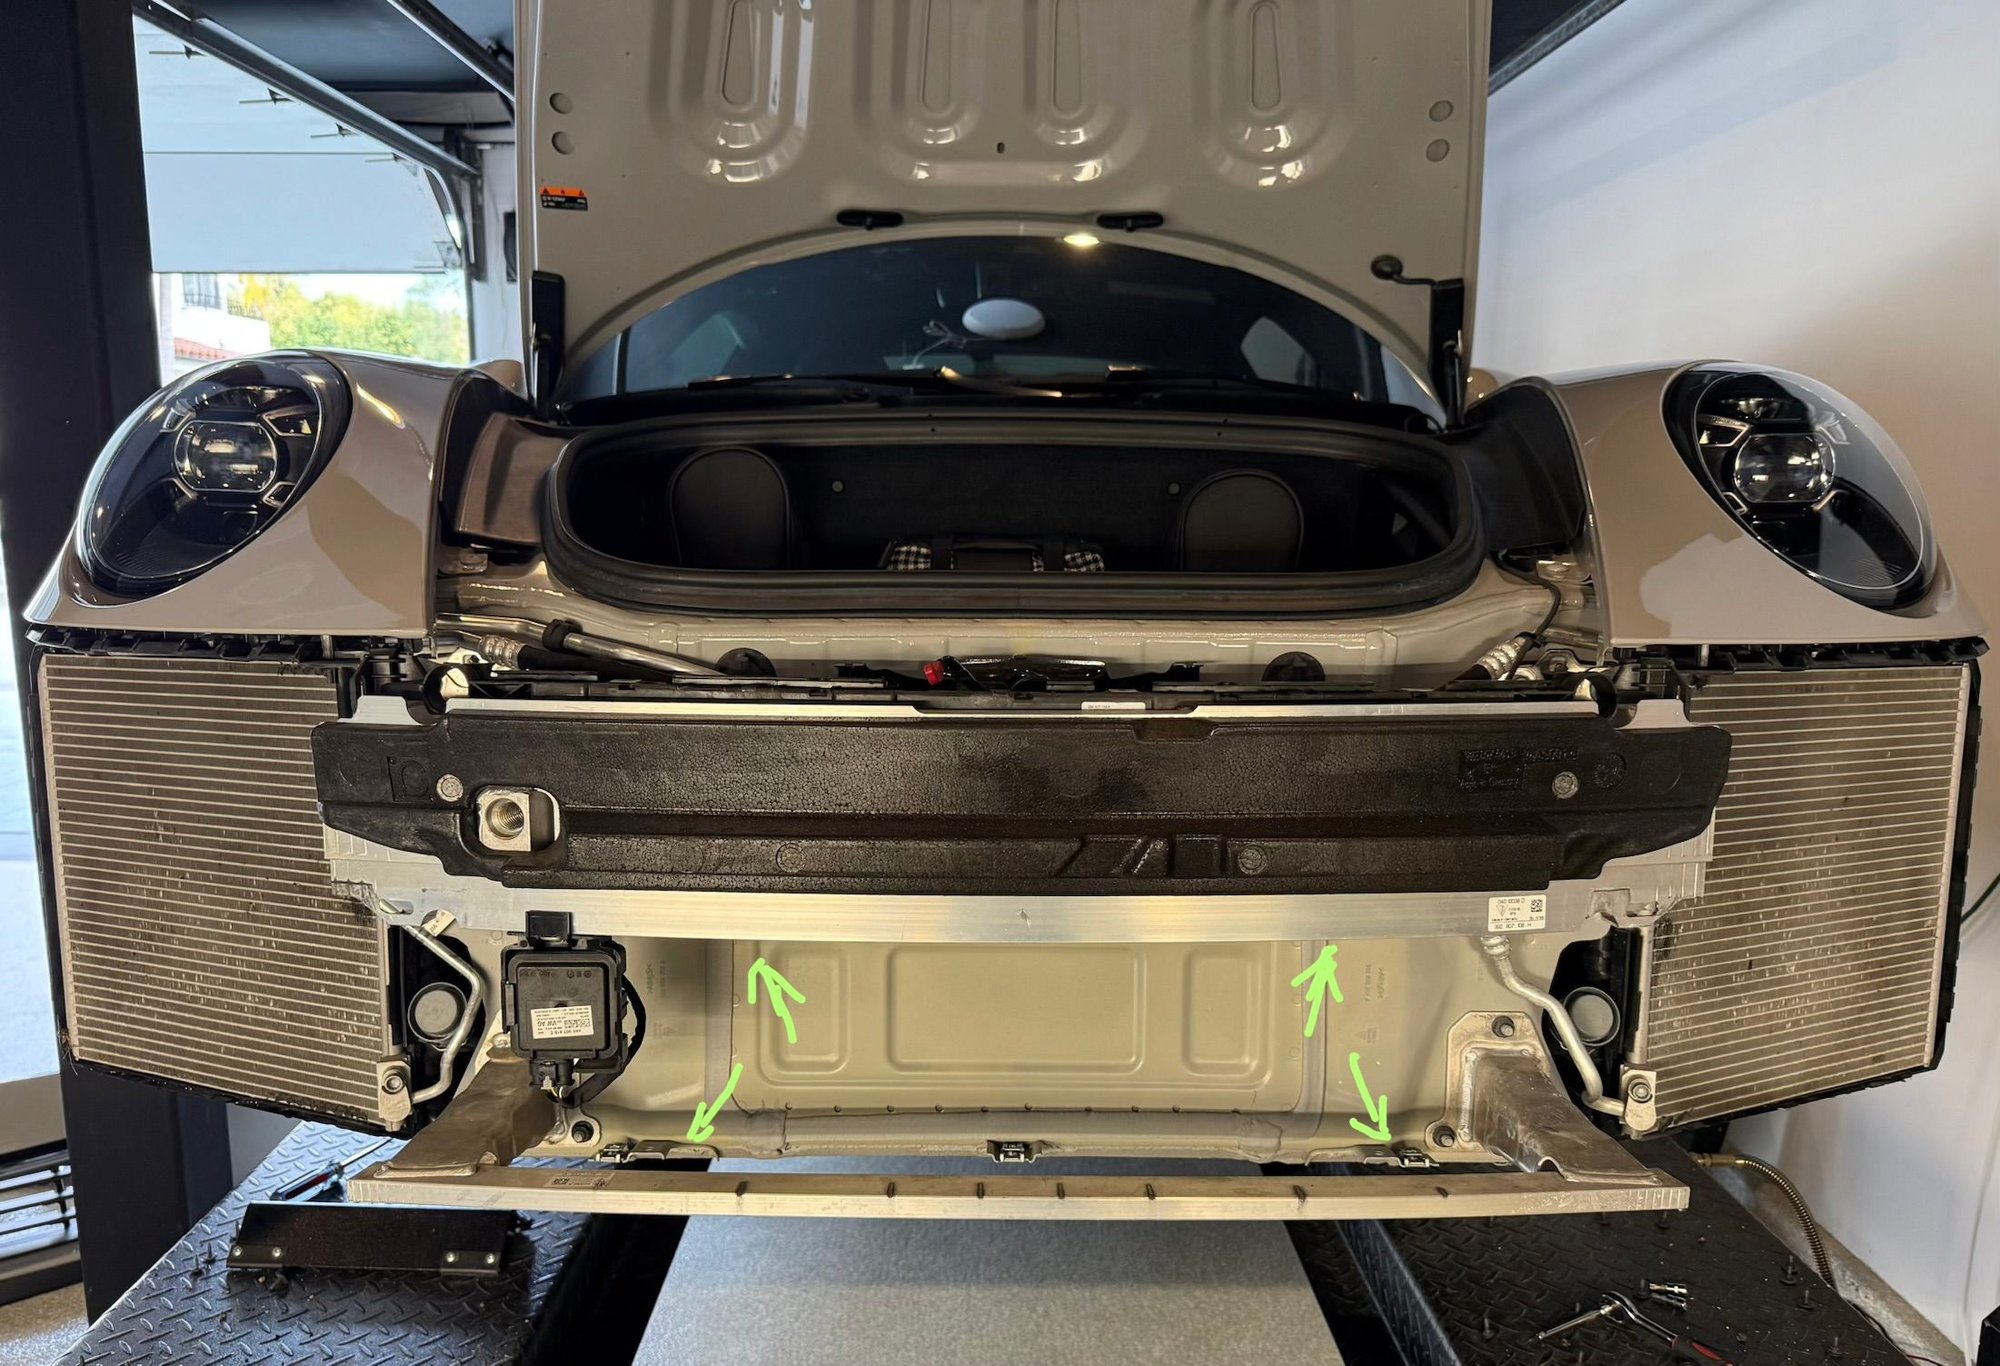
The car is now ready for the center radiator installation.
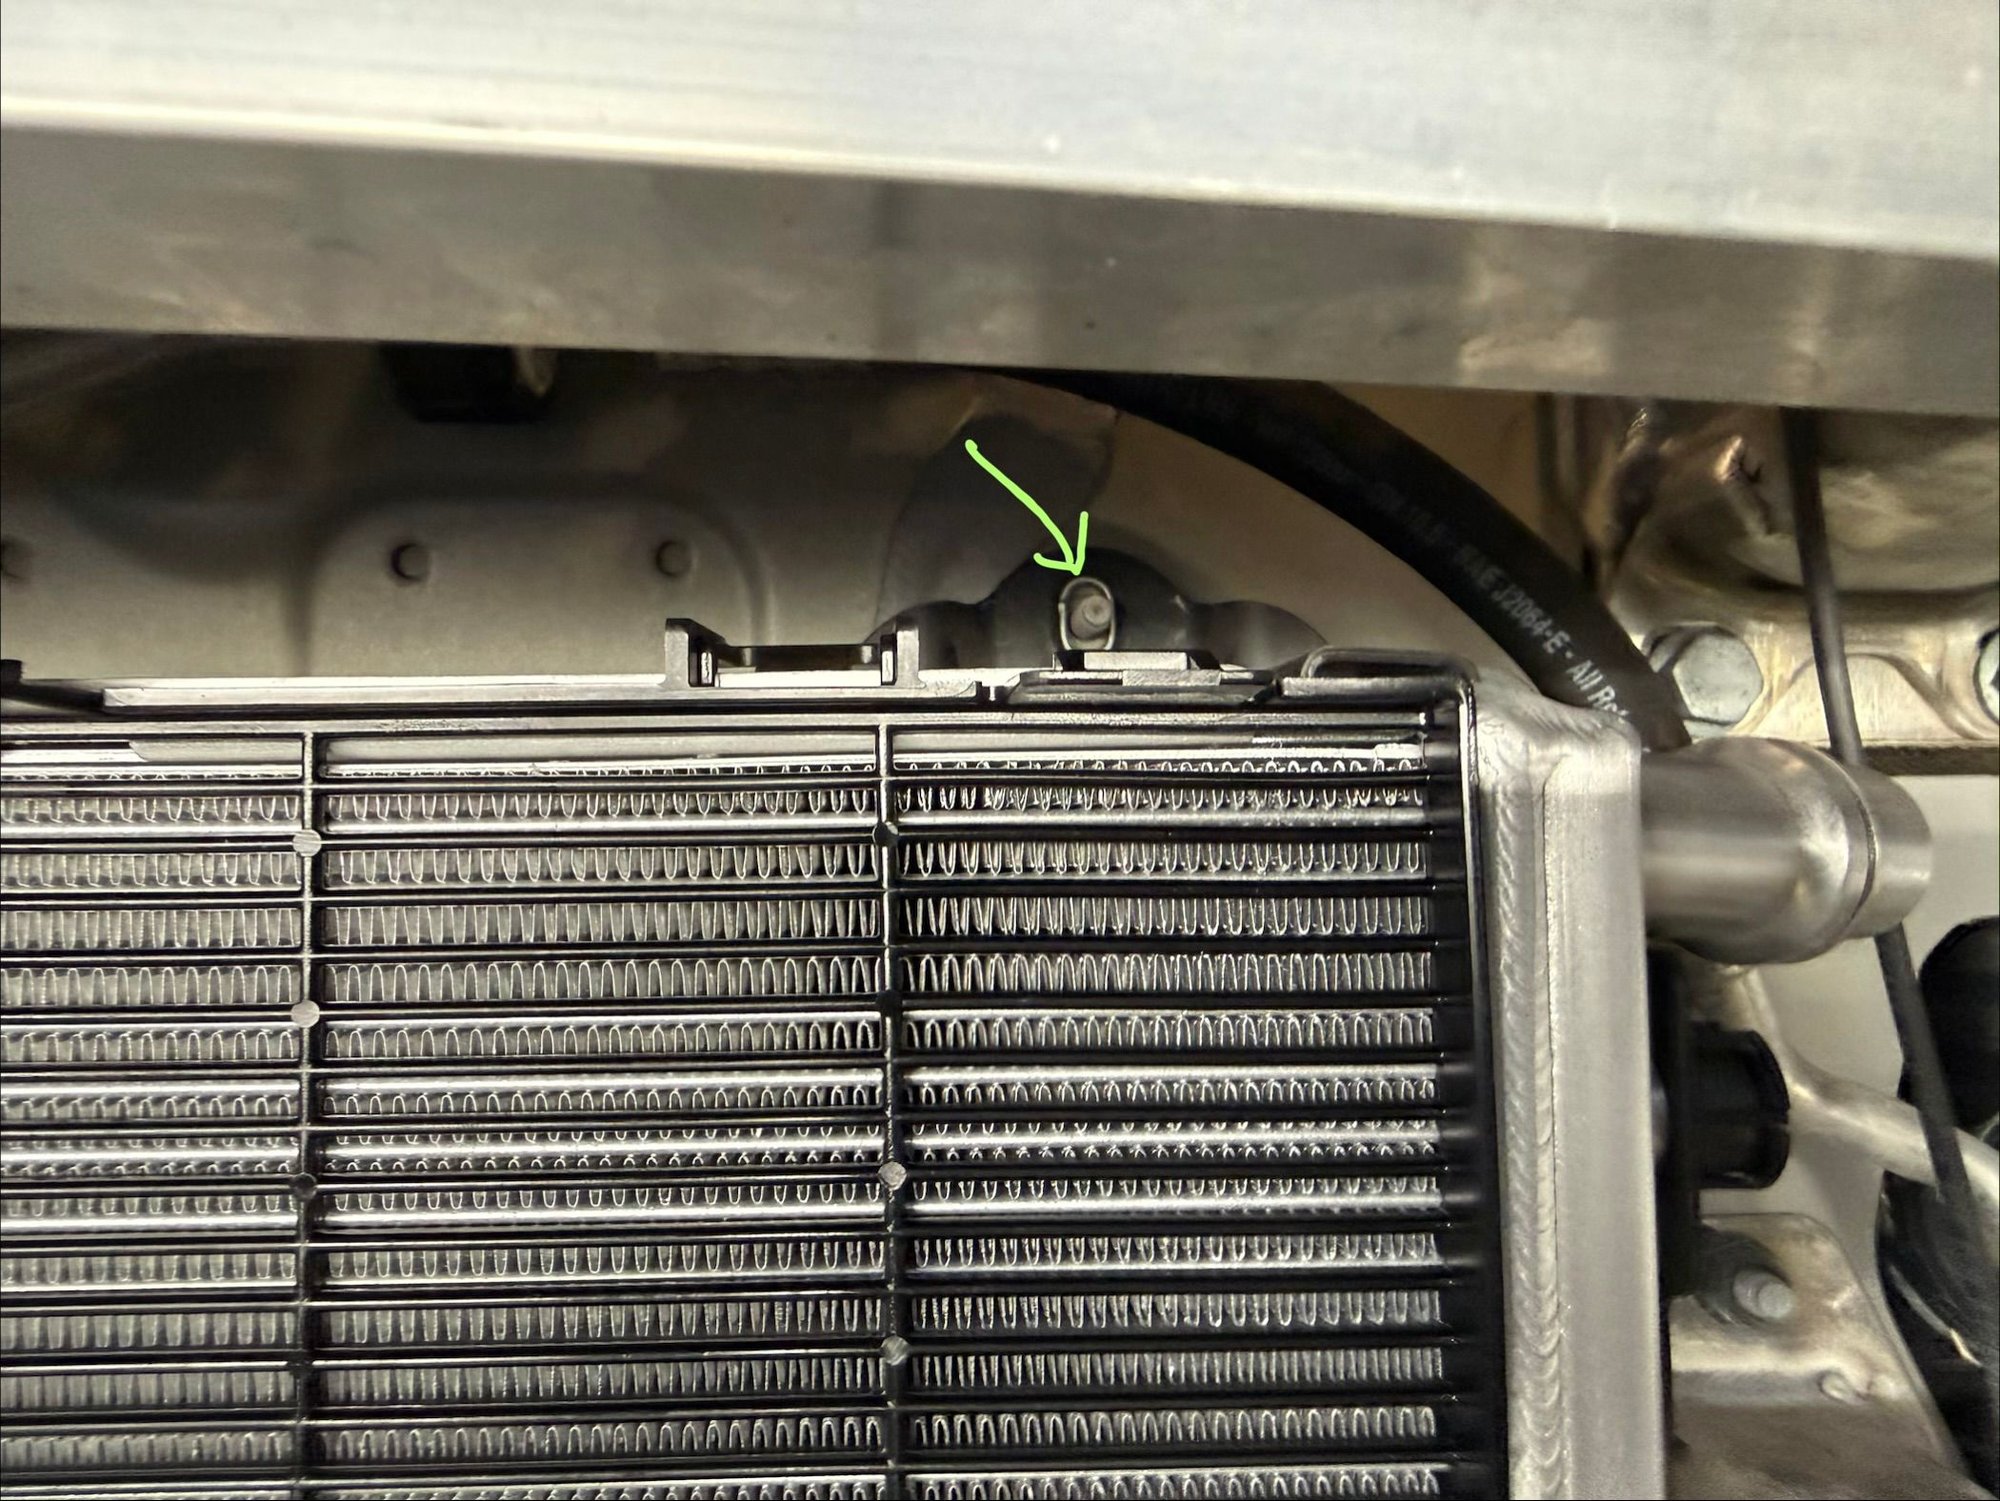
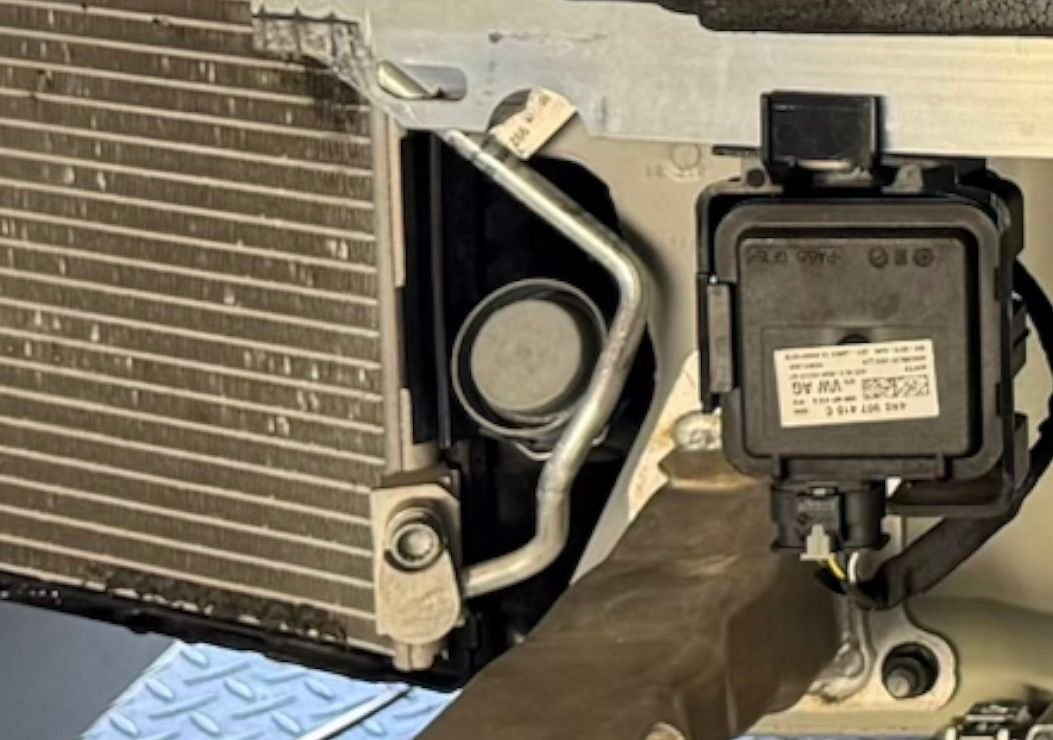
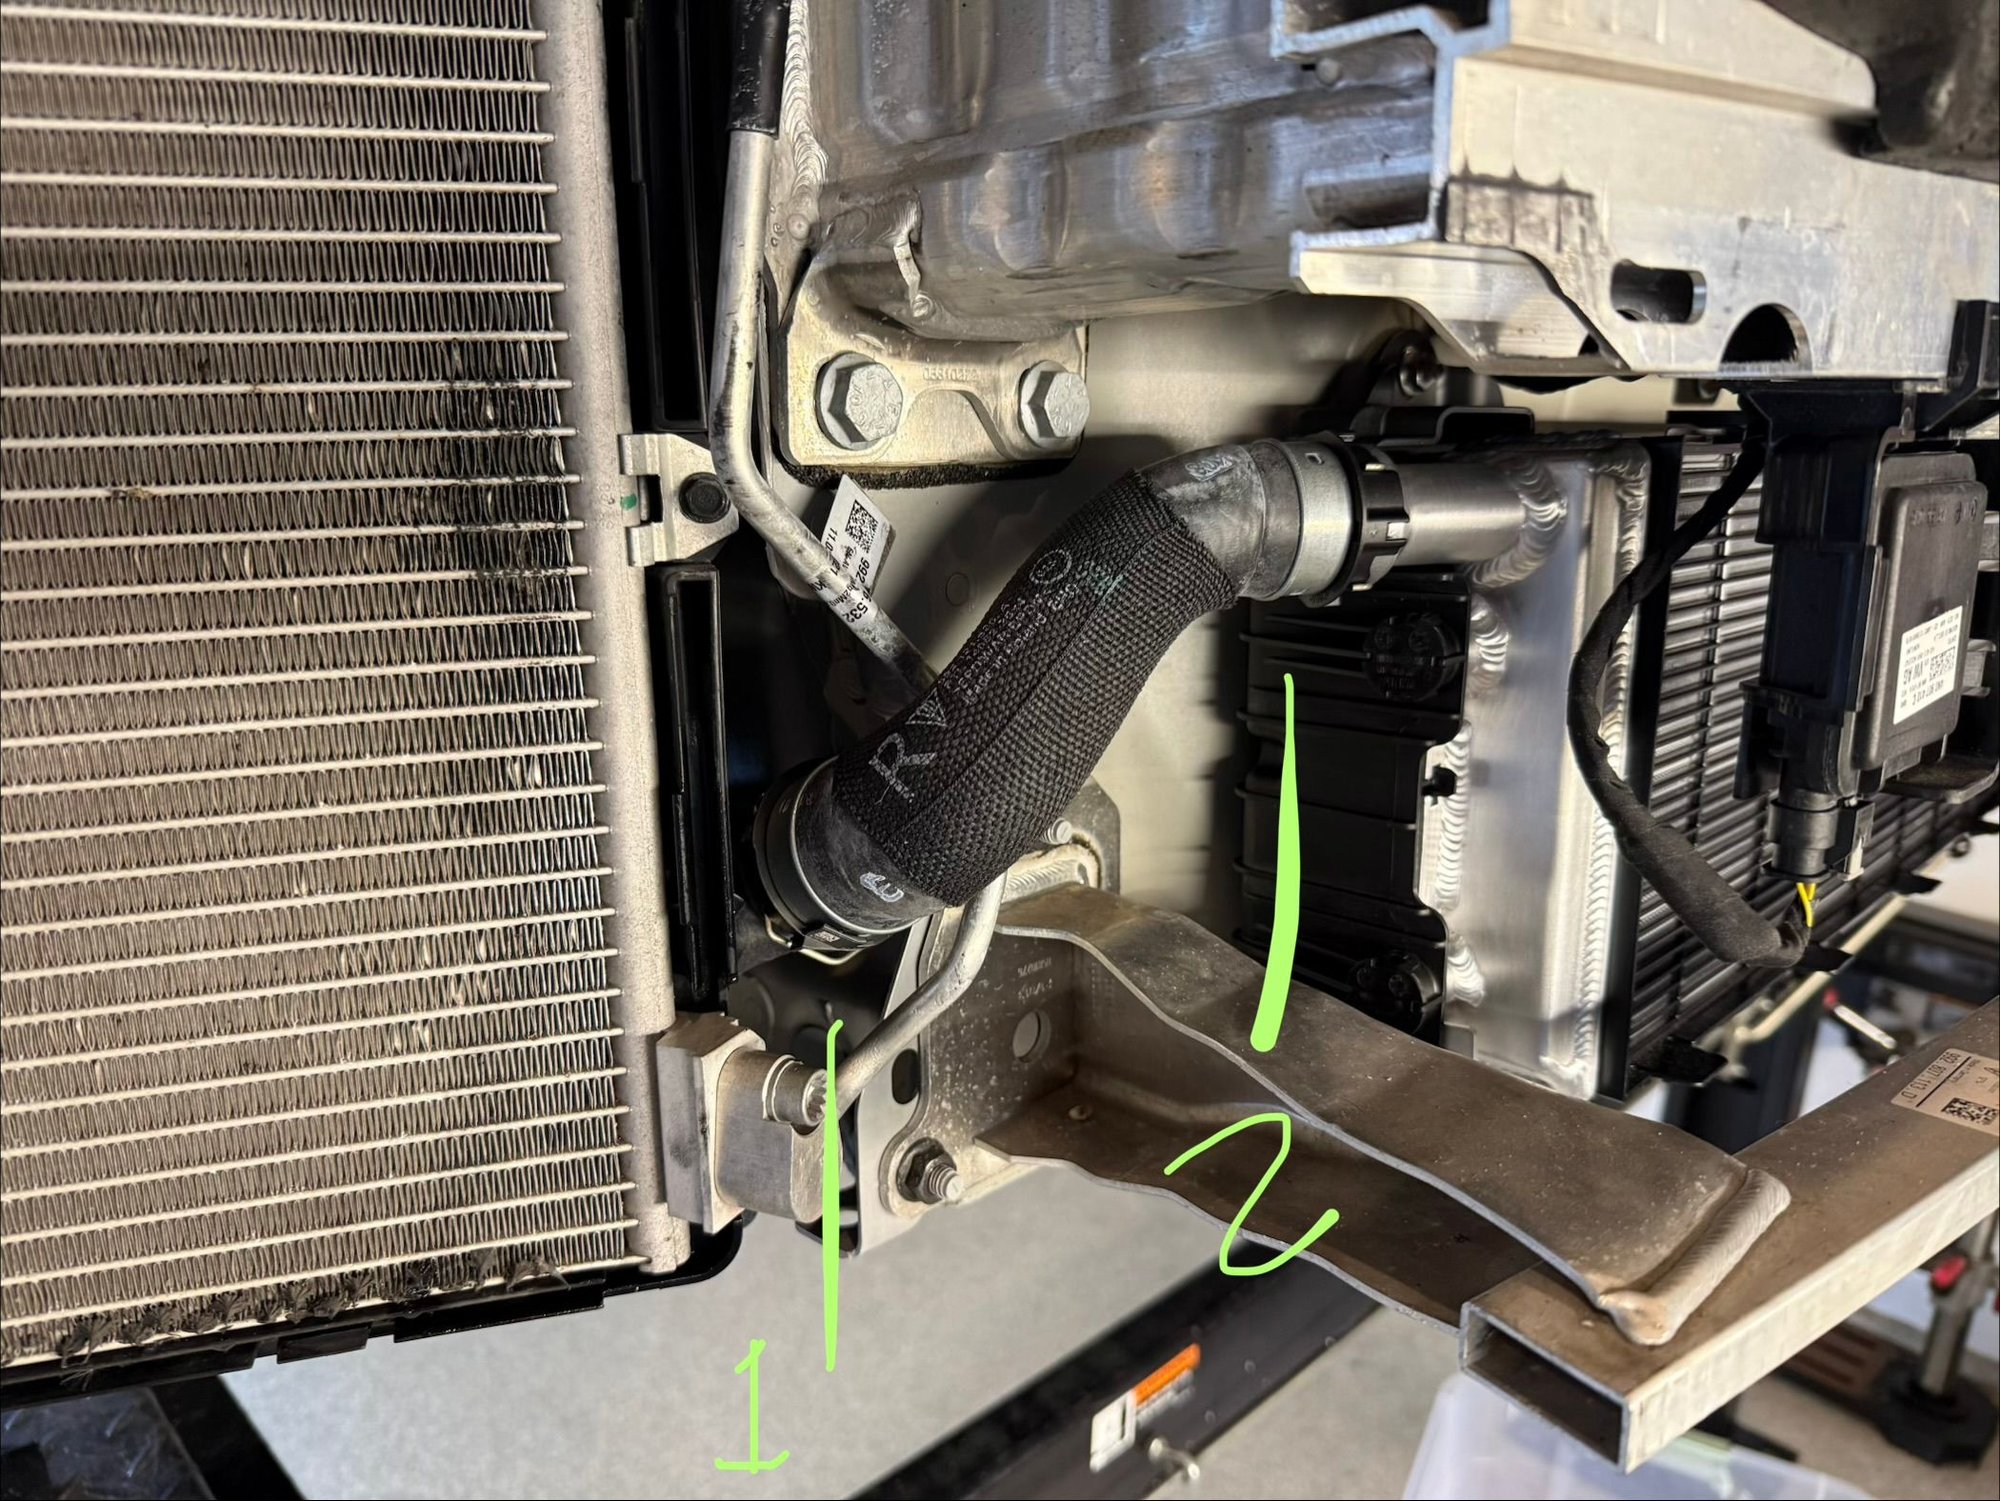
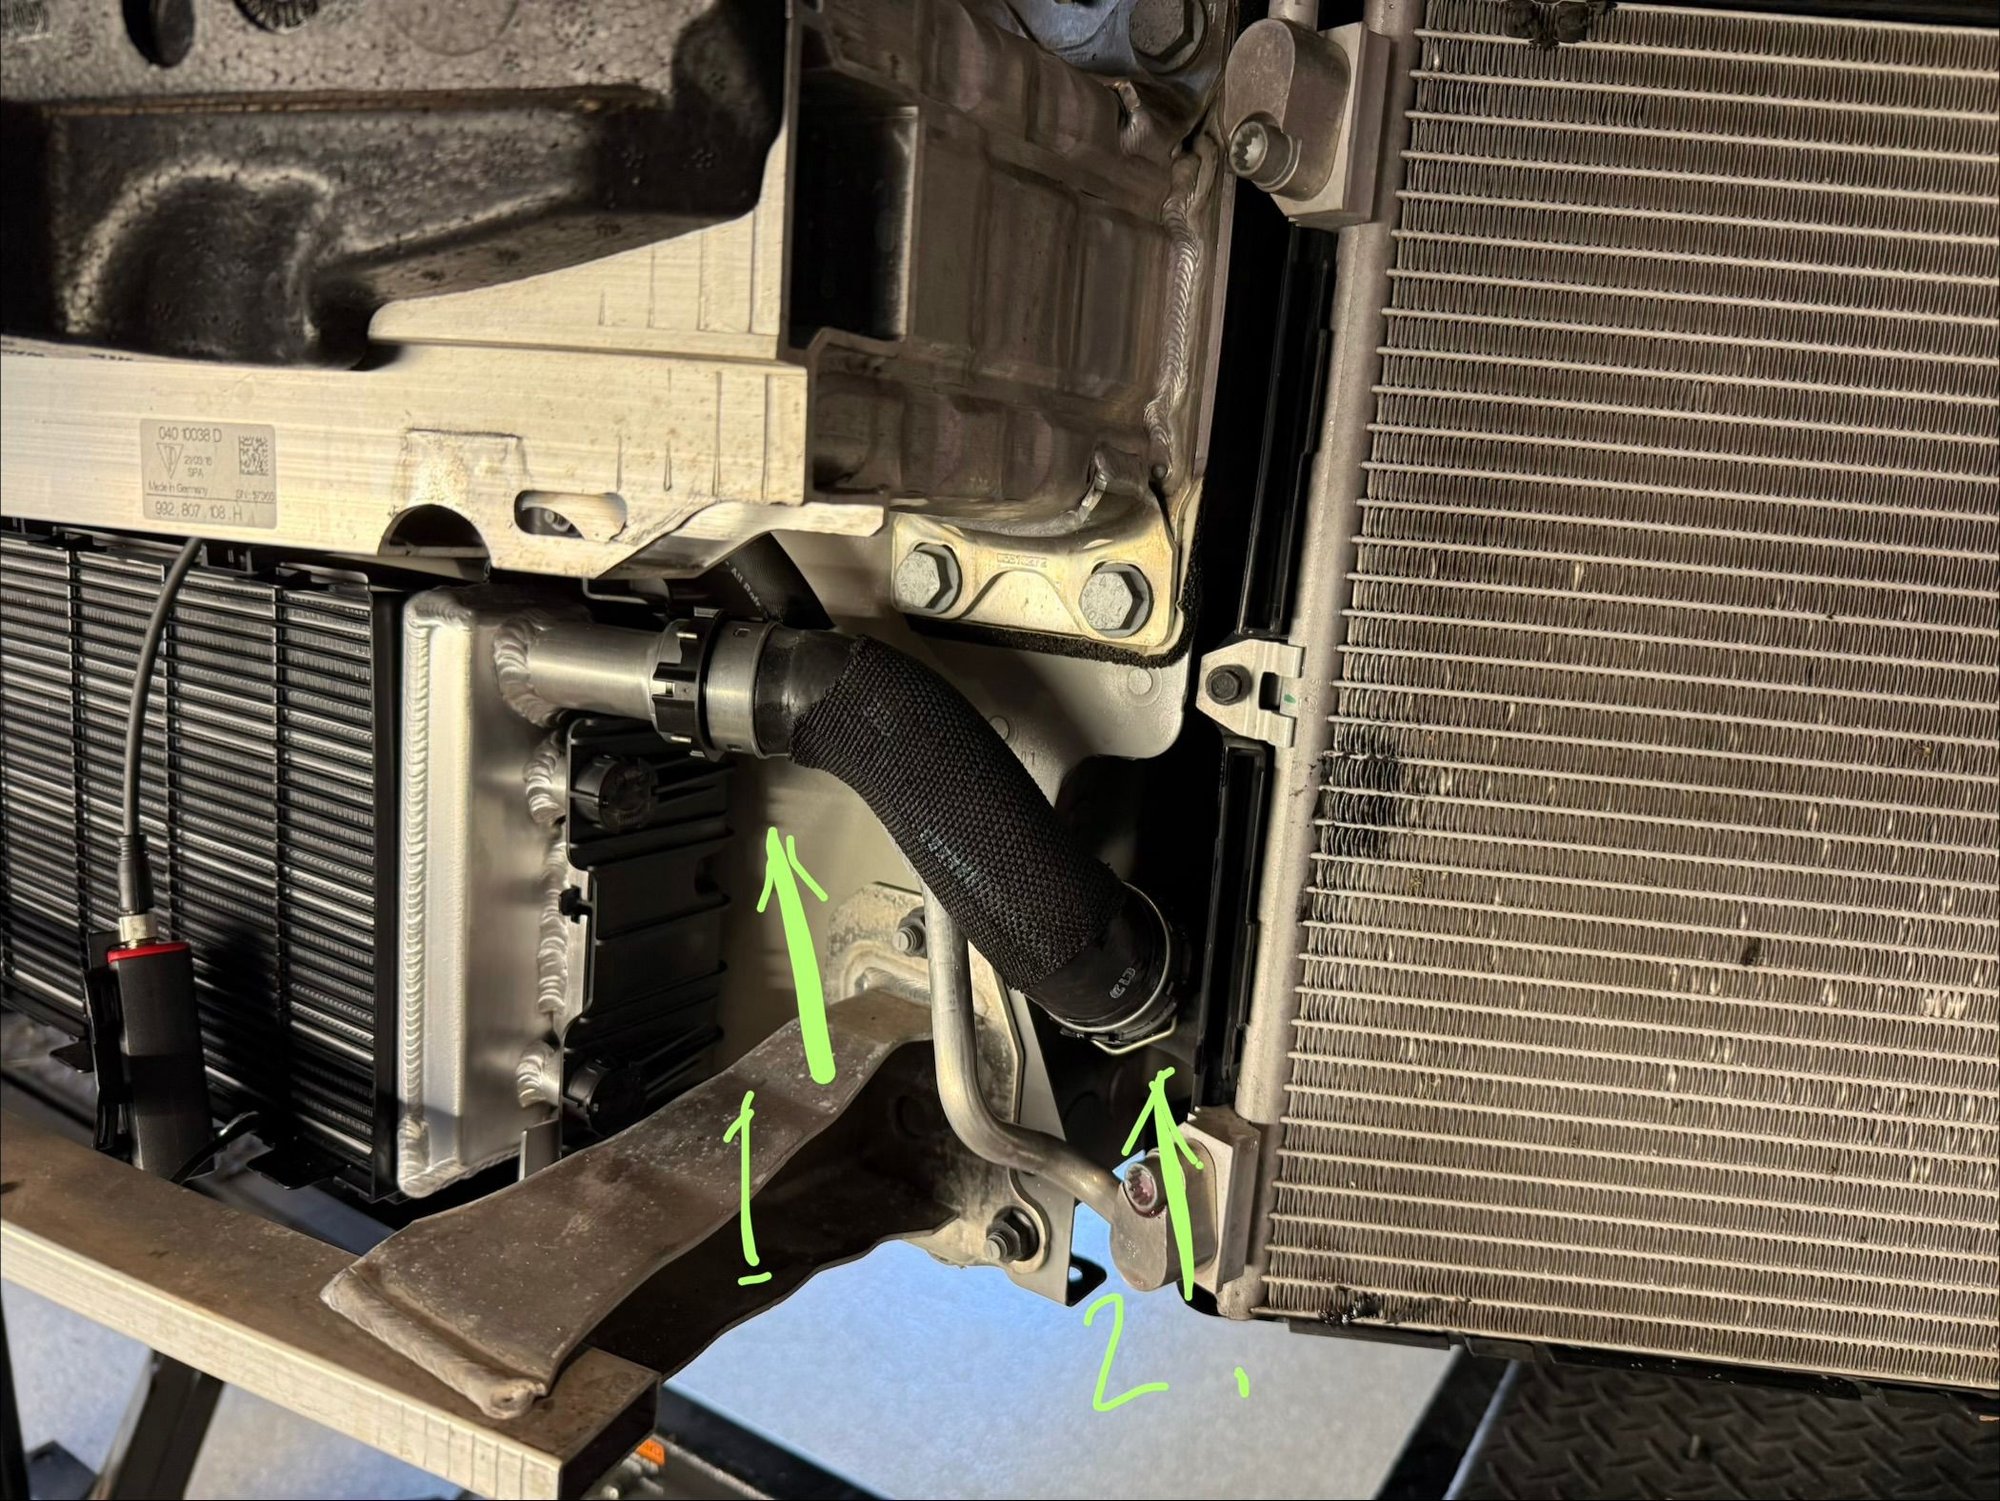
The top arrows point at existing studs on the tub wall that line up with the radiator rear Air guide (Diagram #1 (7) – 992 121 694) that doubles as a radiator bracket.
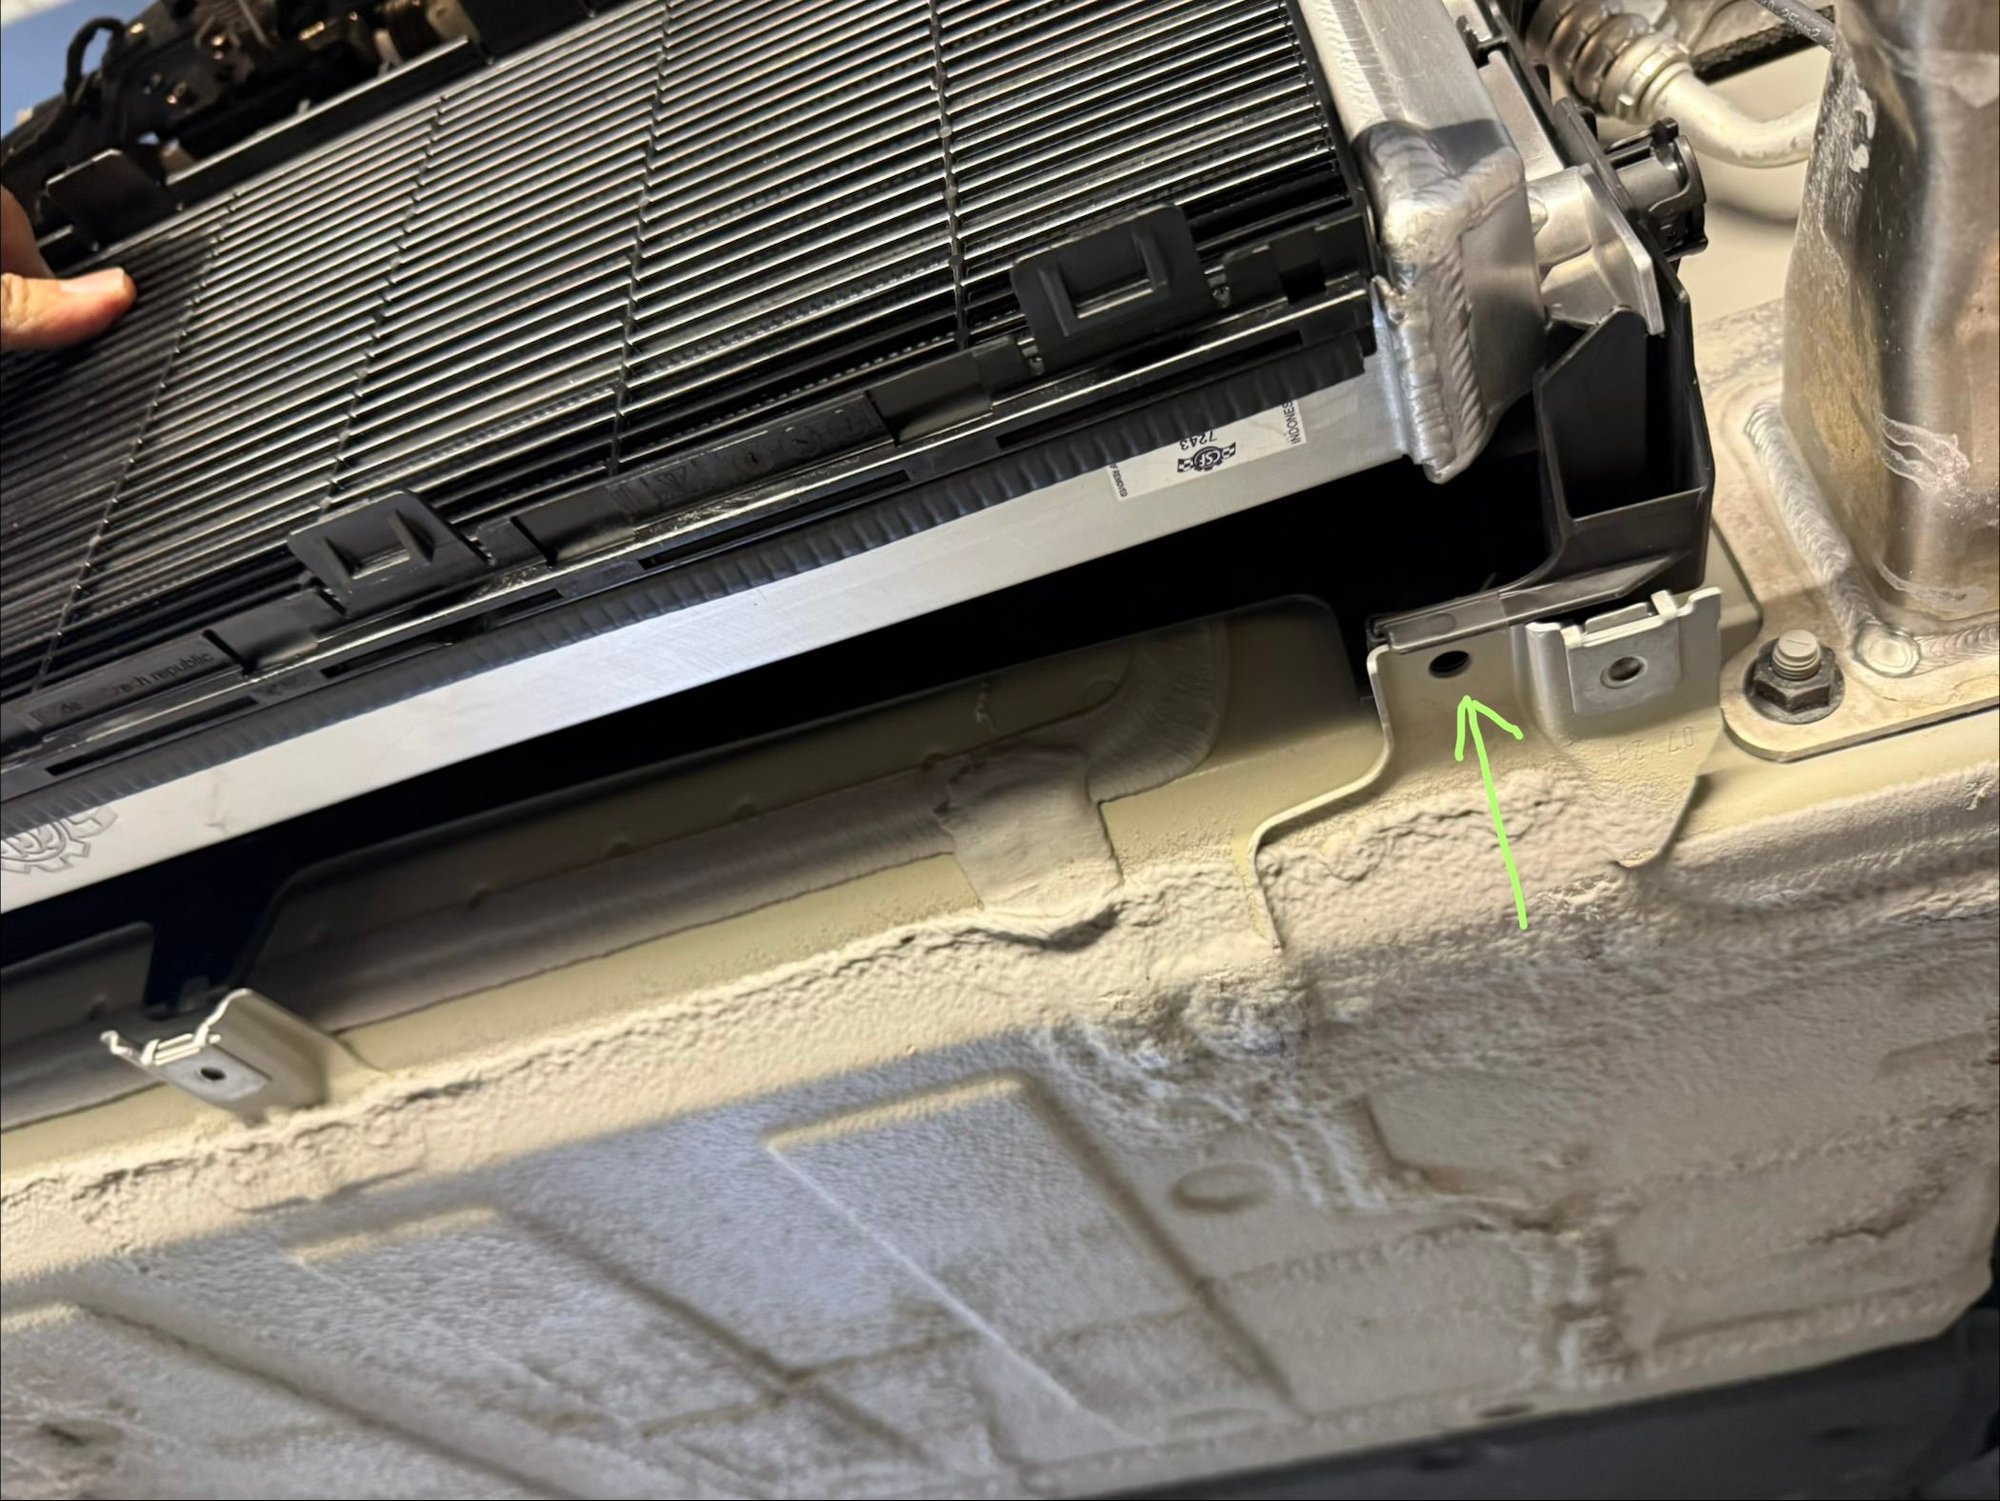
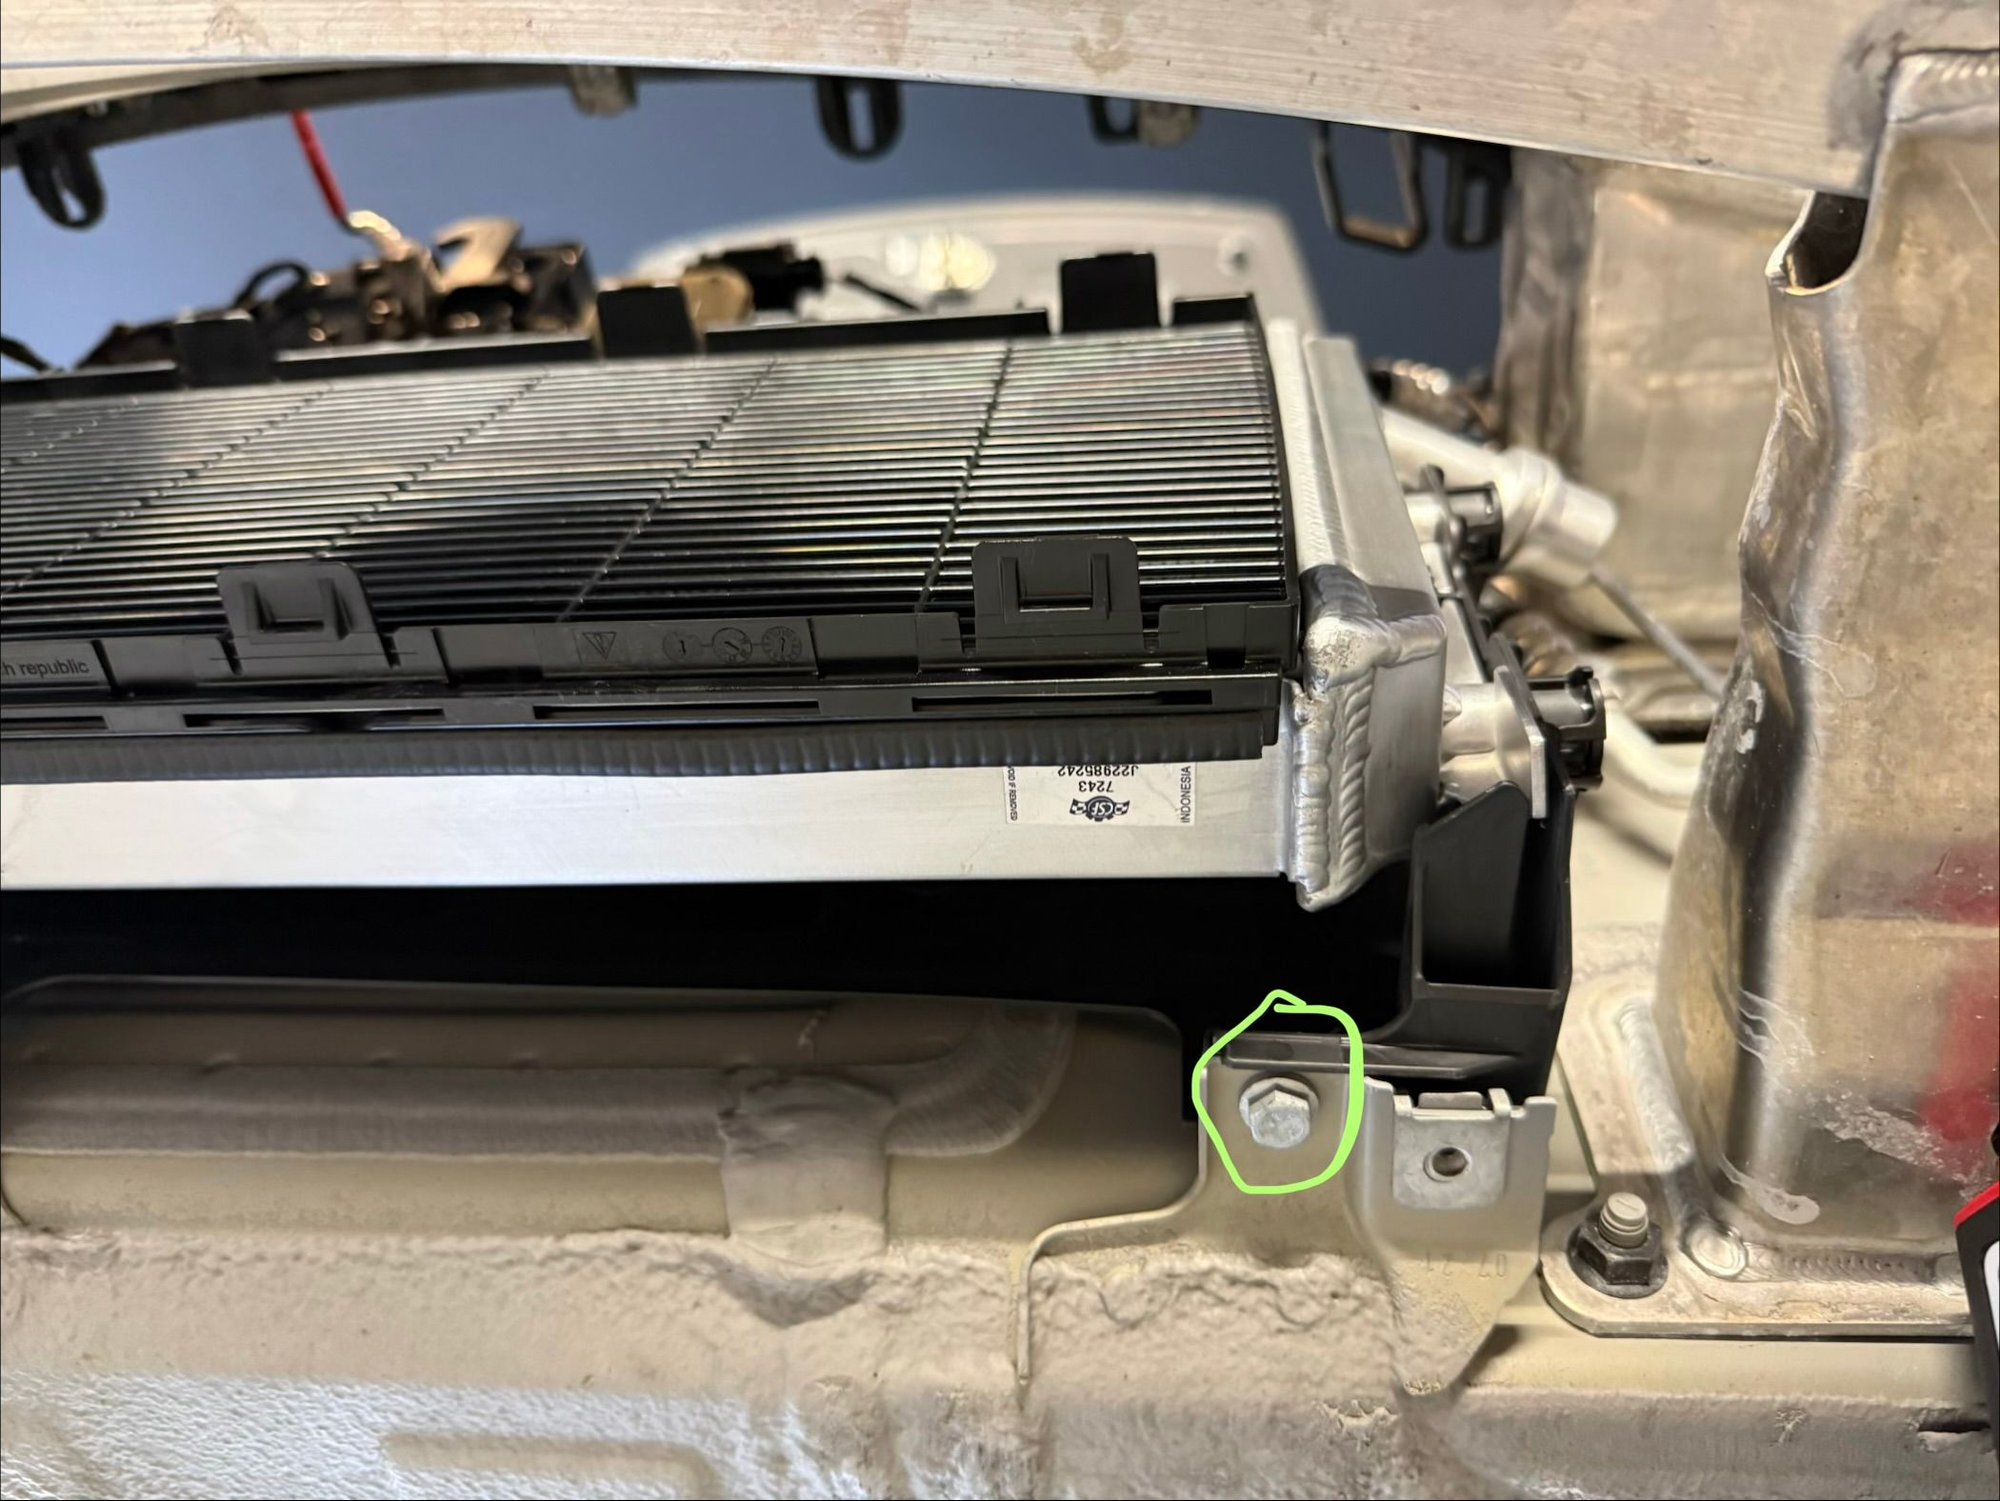
The bottom arrows aim at existing tabs that the “feet” of the radiator rear shroud will stand on.
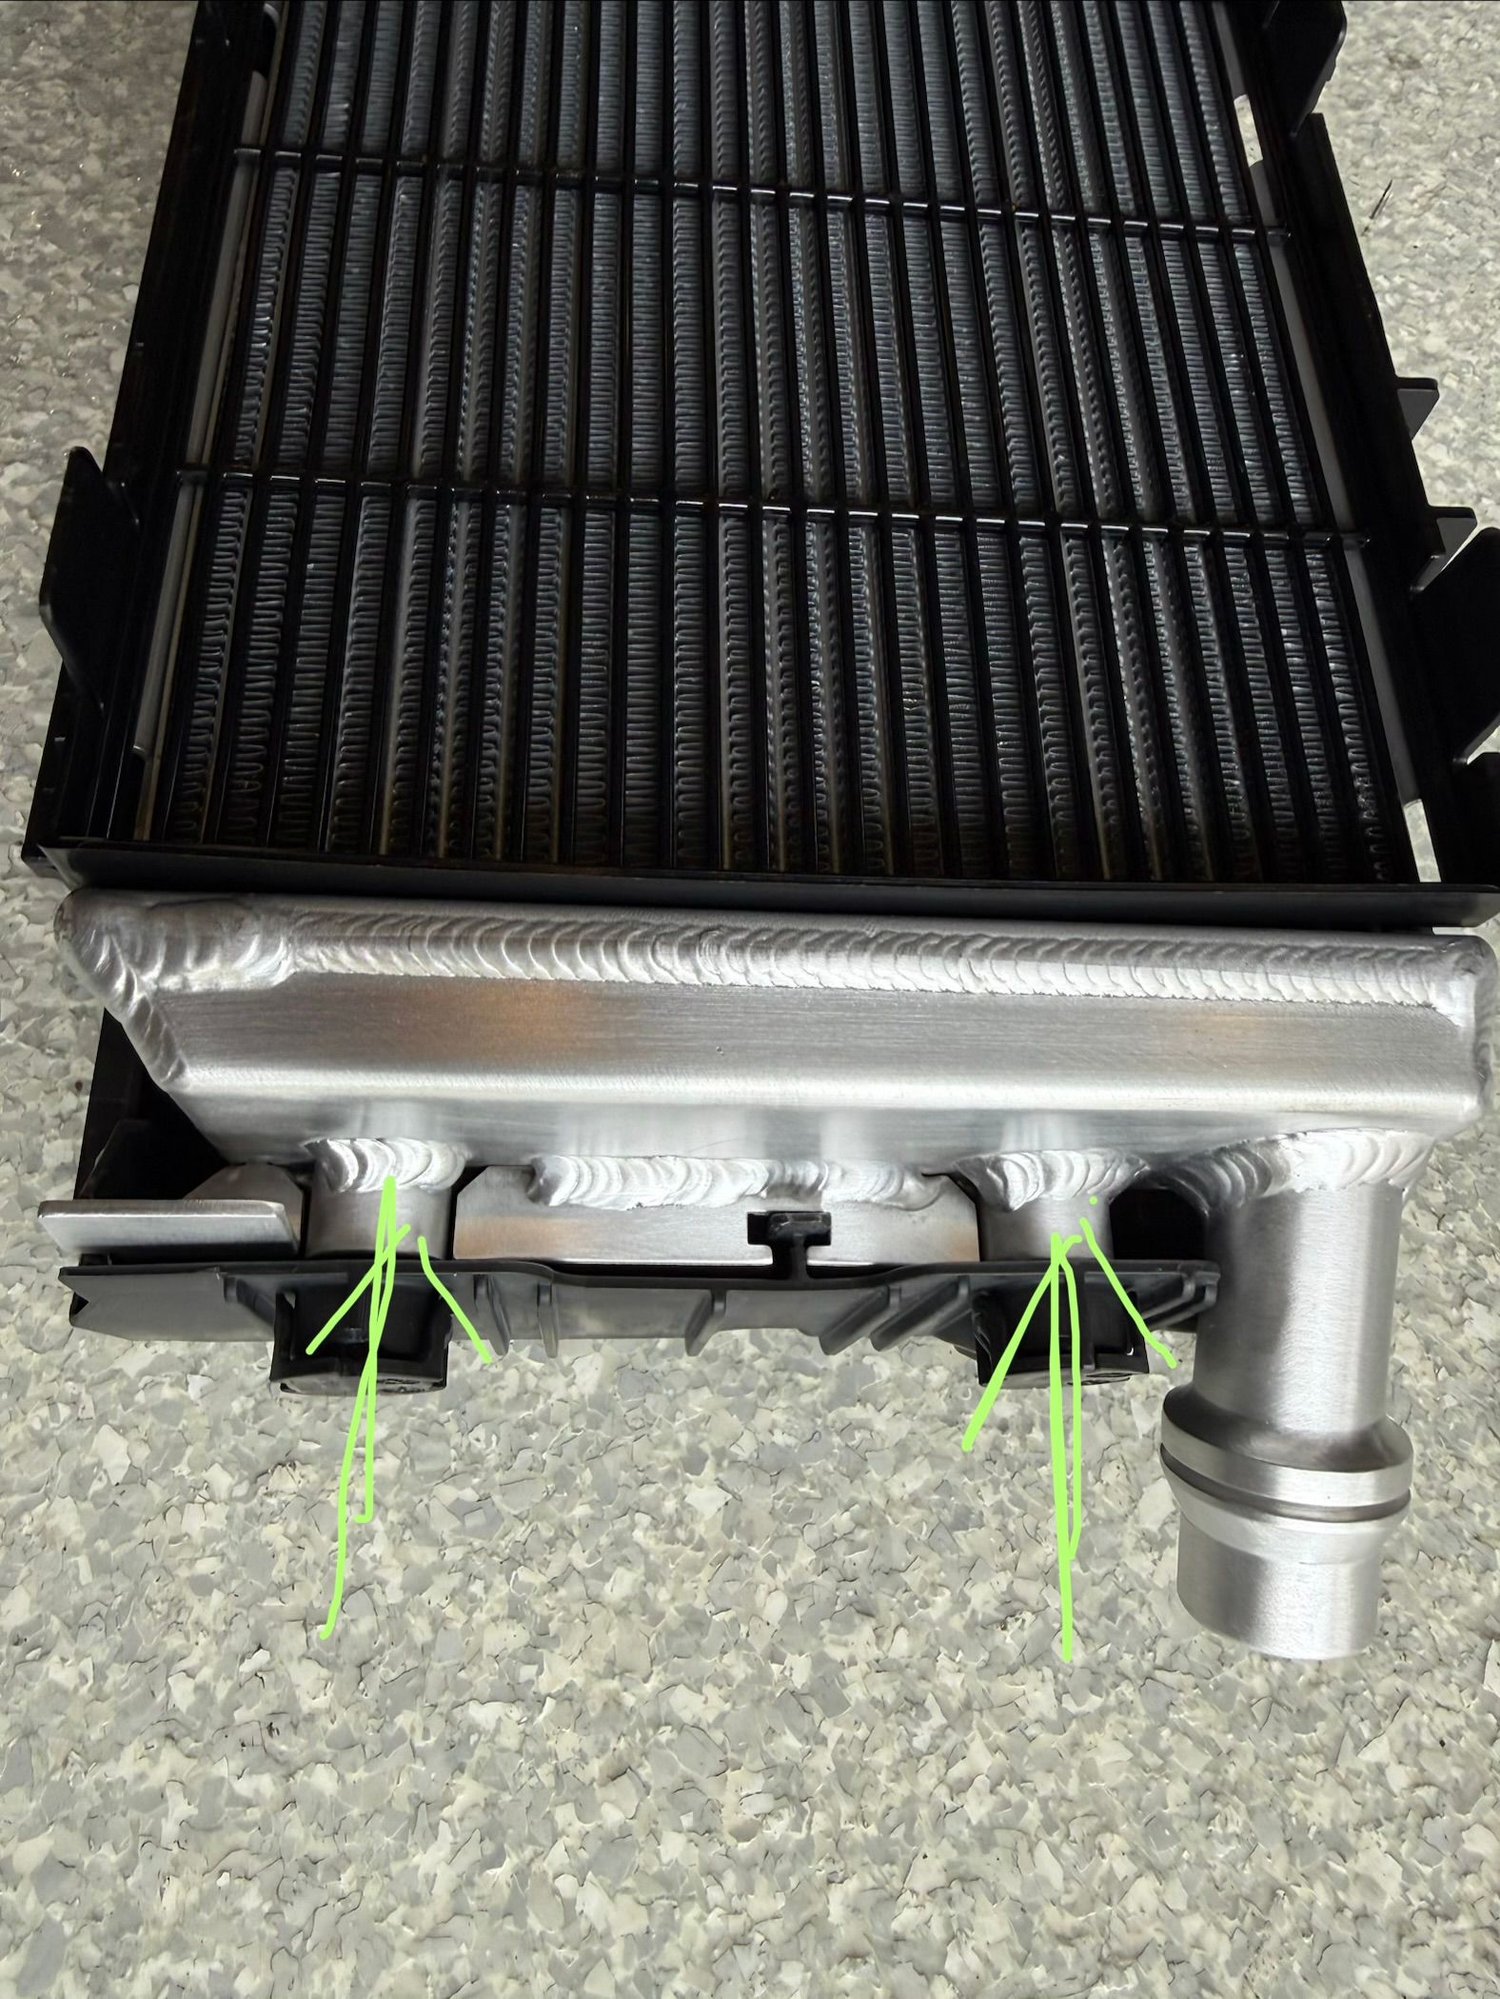
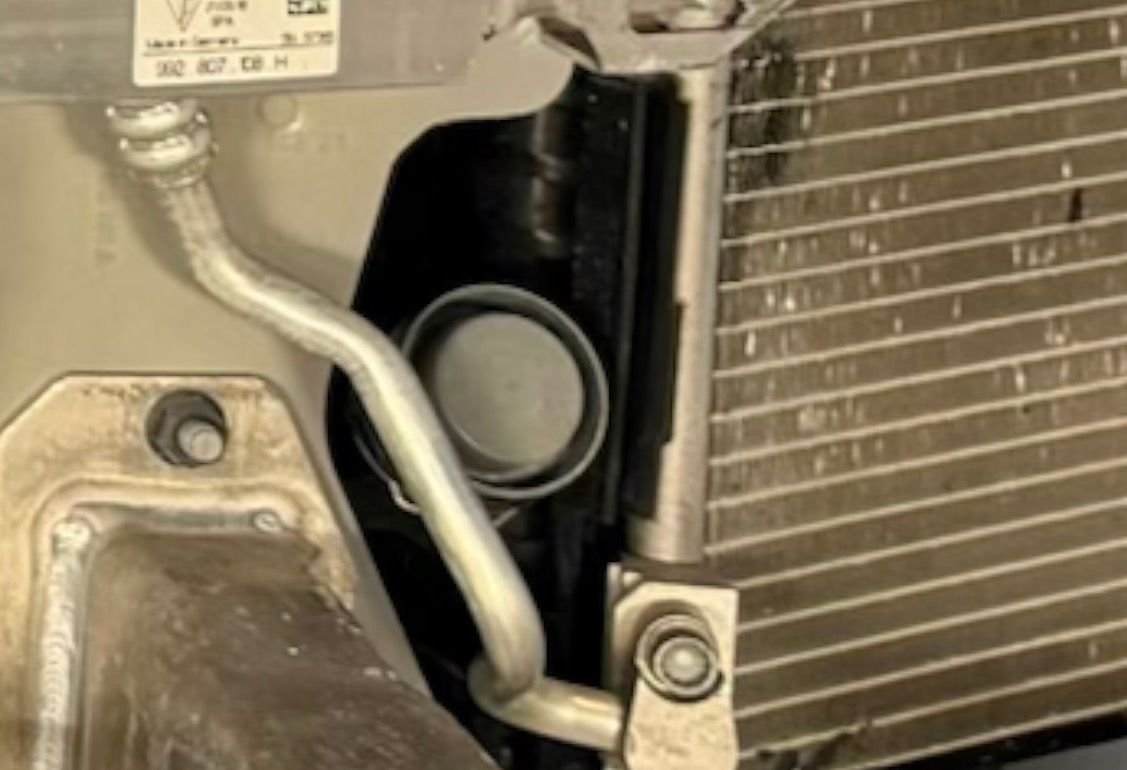
- Assemble the radiator on the rear Air guide (Diagram #1 (7) – 992 121 694), by inserting 2 (4 total) plastic pins on each side (Diagram #1 (9) – 992 121 577). The radiator tubes go on top, the opening of the duct behind the radiator sends air to the underside of the car (unless you are converting to a GT3 duct that vents upwards and needs holes in the hood).
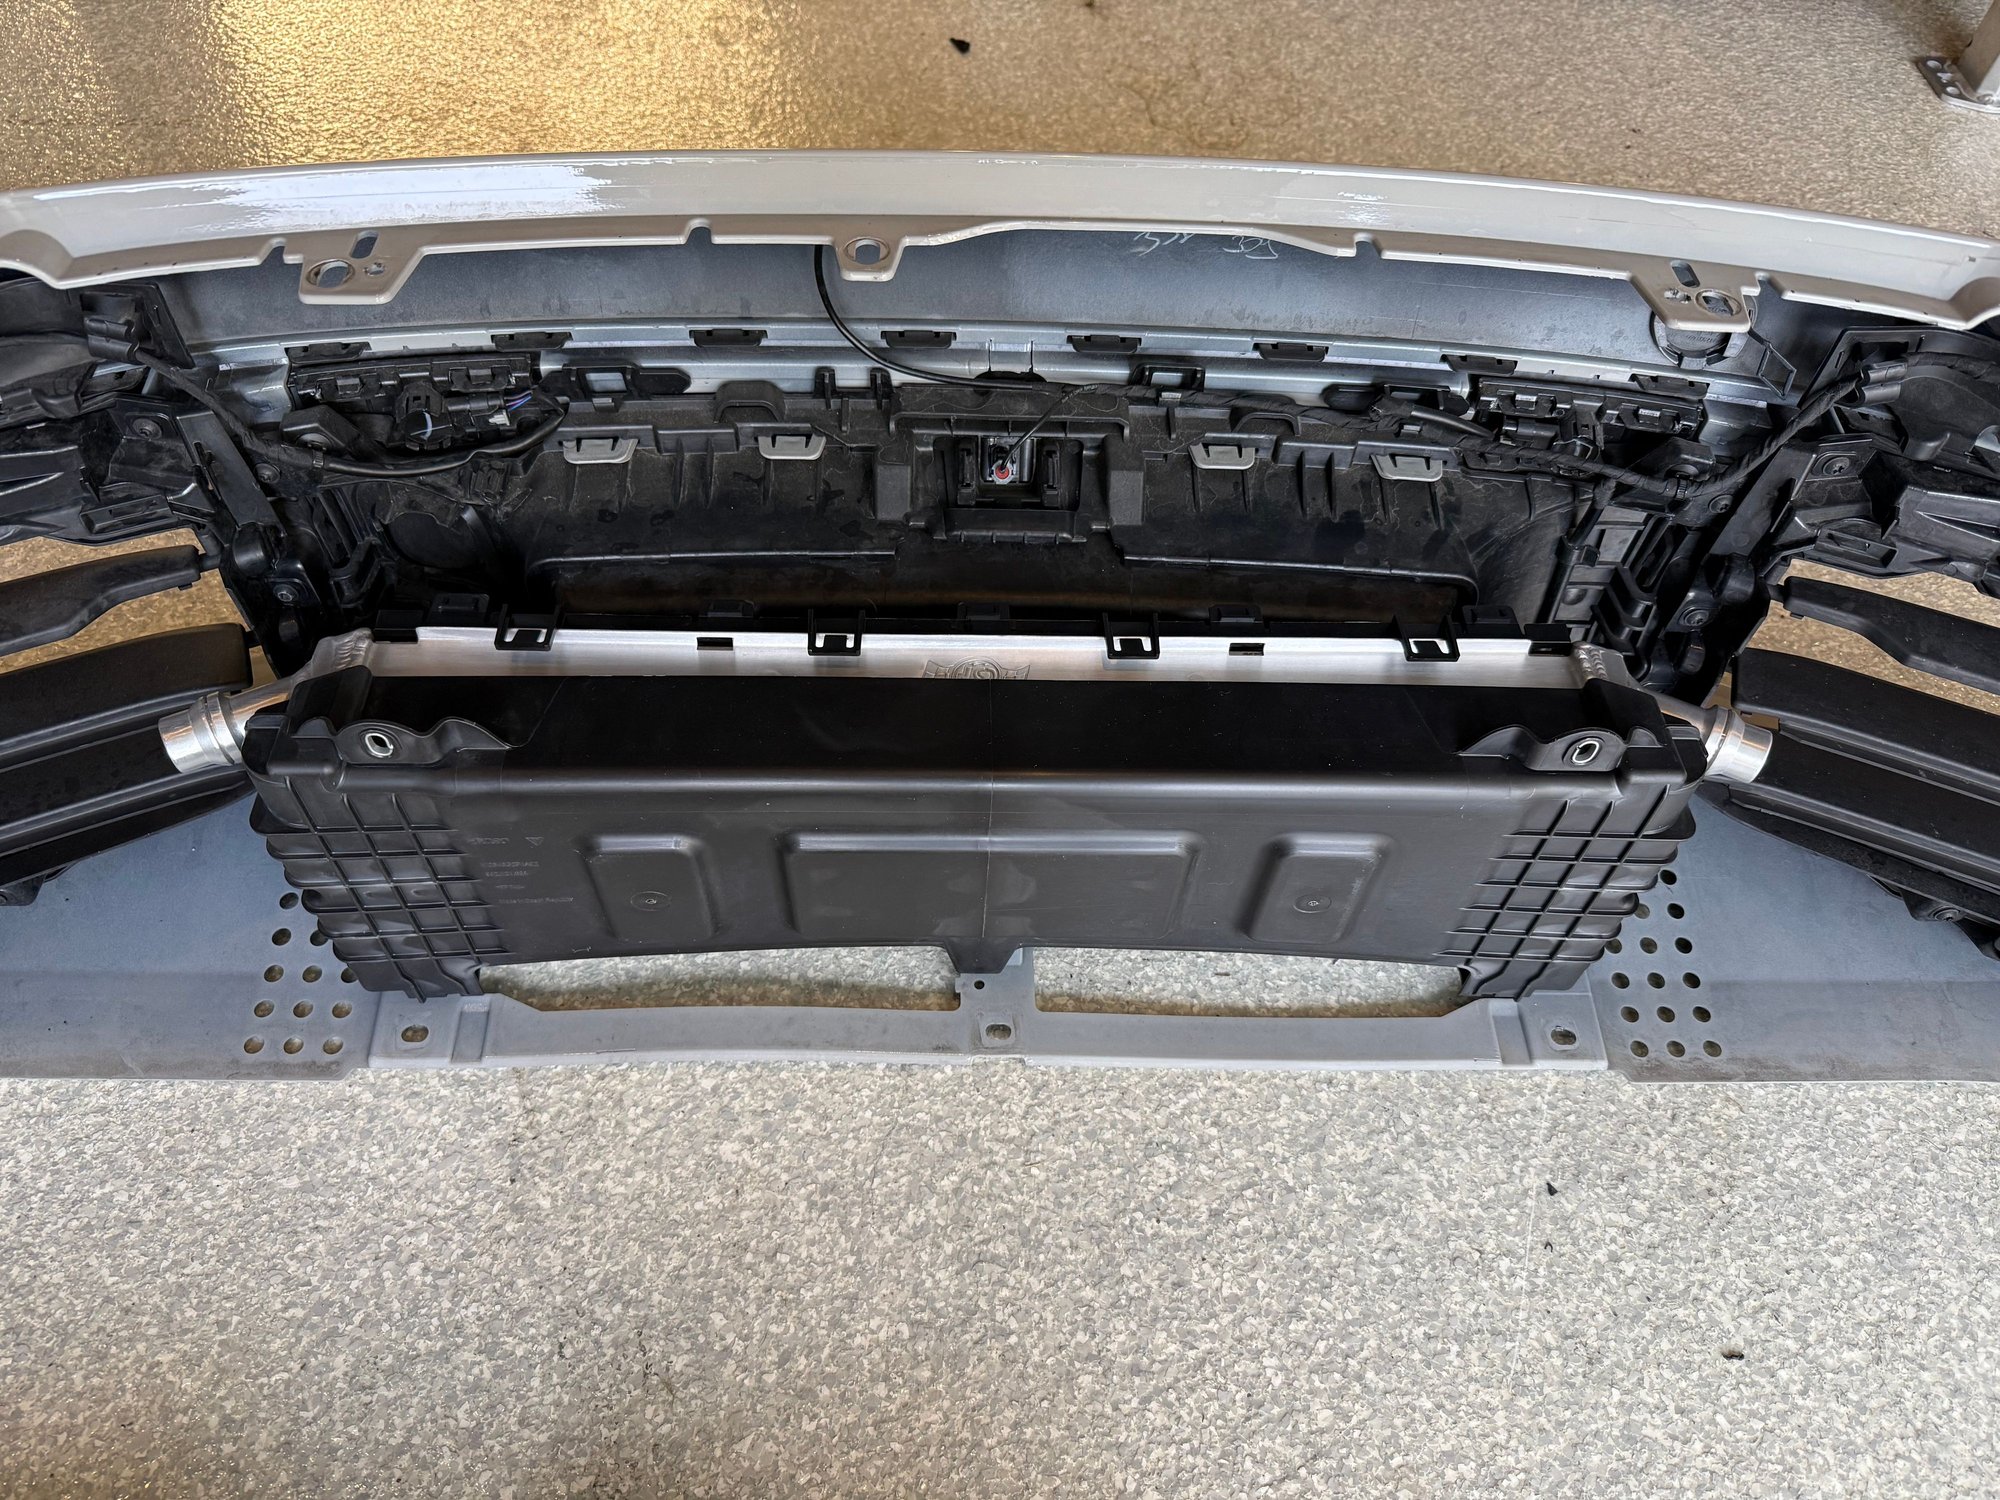
- Install the plastic rock guard (Diagram #1 (10) – 992 121 557 A) that clips onto the front of the radiator with built in tabs and a straight seal strip (Diagram #1 (8) – 9P1 121 687 B) that you put along the bottom of the radiator edge.
- It is easiest to put the radiator up from the bottom and hang on the upper studs and hand tighten the two nuts (Diagram #1 (5) – PAF 008 573).

- Install the two lower bolts/screws (Diagram #1 (6) – N 107 591 01) from the bottom.
- Remove the cap from the existing passenger side radiator:
- Put a bucket below the passenger side radiator.
- Slide the hose end retaining clip down fully with a long screwdriver
- Grab the cap edge with strong pliers and pull/jiggle/rotate and it pops out easily, just need to be persistent with force, no need to mutilate the cap
Note: A little coolant will come out. The higher the front is jacked up, the less coolant comes out.
- Attach the passenger side/right hose (Diagram #1 (3) – 992 121 630 A). Make sure the sliding retaining clips click in and hoses are firmly on.
- Driver side:
- Connect the driver side/left hose (Diagram #1 (2) – 992 121 629 A) loosely on the new radiator first, turn it up as much as possible and use a funnel to fill up the radiator to the brim.
- Remove the cap from the existing driver side radiator (again use a bucket, slide the retaining clip all the way down and pull/jiggle/rotate the cap out with strong grip pliers)
- Connect the hose on both sides, again ensuring the retaining clips click and hose is firmly on.
Below is how much coolant was lost during the installation. Approximately half was from opening the rads and half from spilling while filling the 3rd radiator.
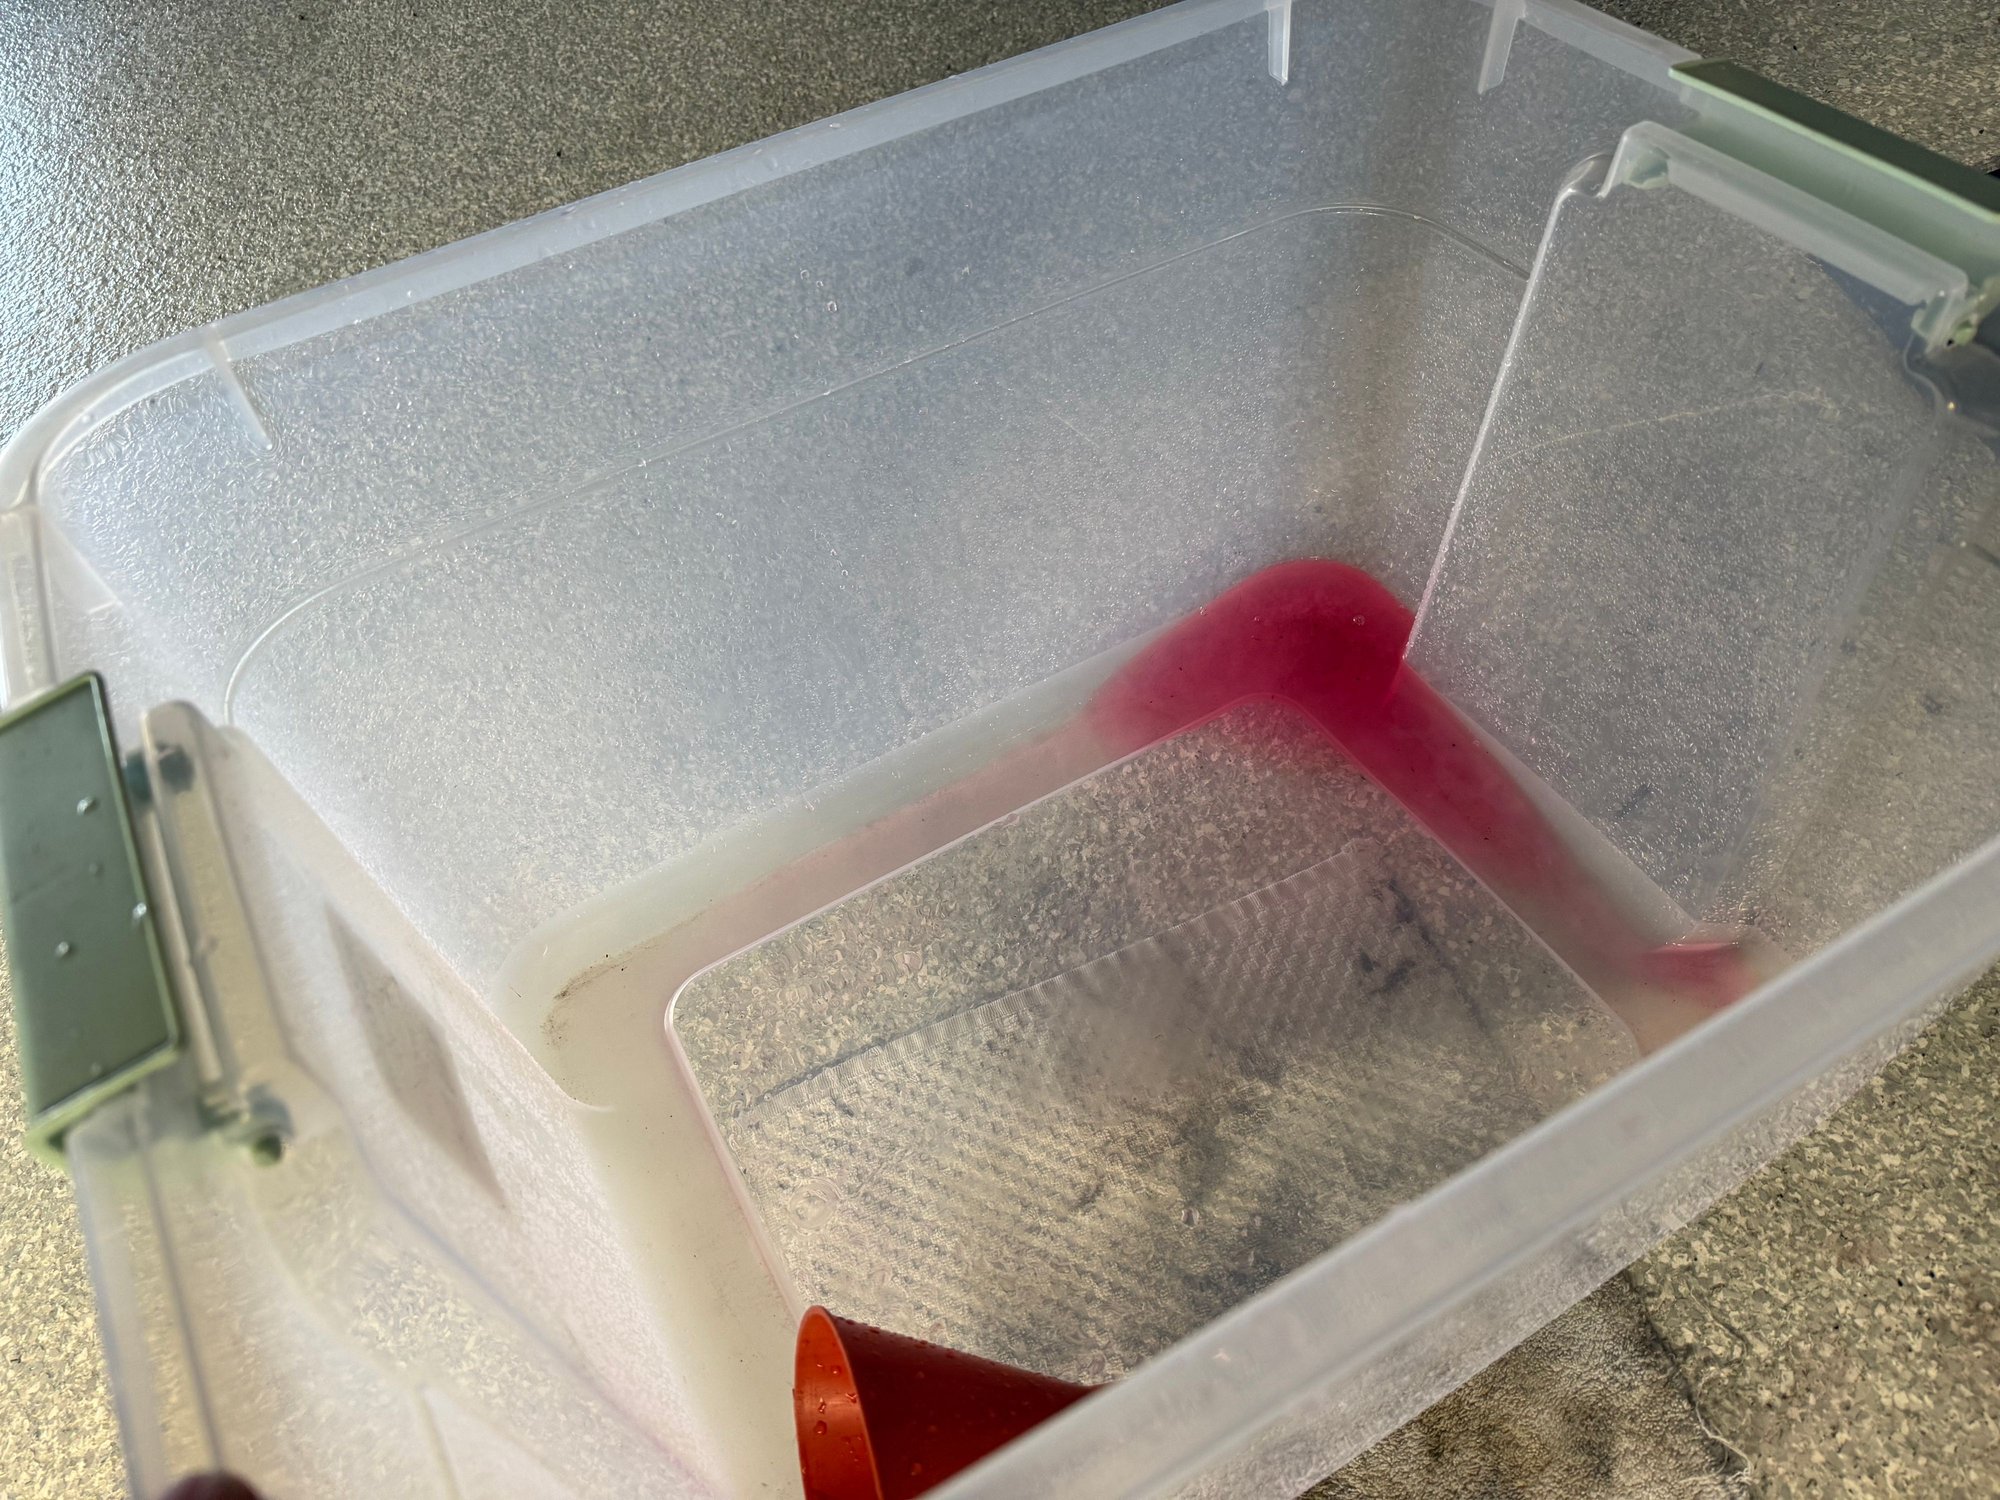
- Reinstall the side ducts.
Note: zip ties to the right in this photo were temporarily holding a permanently powered racetrack transponder sat behind the impact bar, this has now been moved to a better location.
- Remove the center faux grille and install the new part that is open (Table #2).
You can also cut the center open which saves some time but it is harder to get good access angles for a phenomenal result. If cutting, use the forward facing air duct to trace how large the opening should be.
Bleed and leak check:
- Setup:
- Test fit bumper
- Plug in all connectors
- Lower the front of the car
- Chock front wheels then raise the rear of the car high
- Plug in battery
- Bleed Process:
- Open coolant fill cap
- Idle the car just until the thermostat opens and burps air. Fill up coolant right after it burbs and turn the car off. Wait a little and repeat the process, keep repeating until the system doesn’t burp air anymore. Never run the car hot, just enough to open the thermostat, and let it cool a bit between each cycle.
- When you are sure you’ve refilled more than spilled out, put the coolant fill cap back on securely.
- Run the car a little longer now and attentively monitor coolant temperature until fully hot and observe when temp reading reacts (drops) thanks to the thermostat opening. If it doesn’t briefly cool down you still have air trapped somewhere.
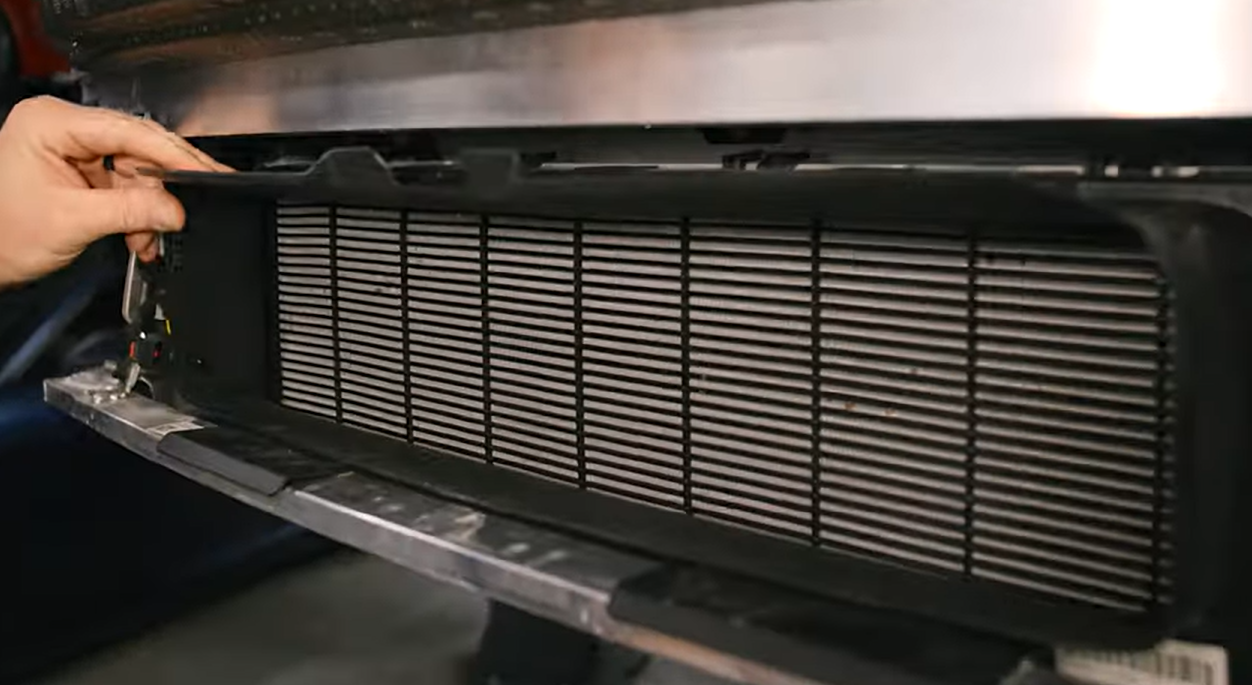
- Before putting on the bumper skin, add the front center air guide (screenshot below from a KIES Motorsport video)
- Finally, once all air is bled out, assemble the bumper, fender liners etc.
Best Possible Upgrade
For the best cooling performance, CSF recommends upgrading the side radiators (CSF #7241 and #7242) in addition to adding the center radiator. While adding/retrofitting the center radiator, you have done 80% of the work required to replace the side radiators. This saves a lot of energy and labor time in the future and offers the best possible cooling for your 911.


COMMENTS